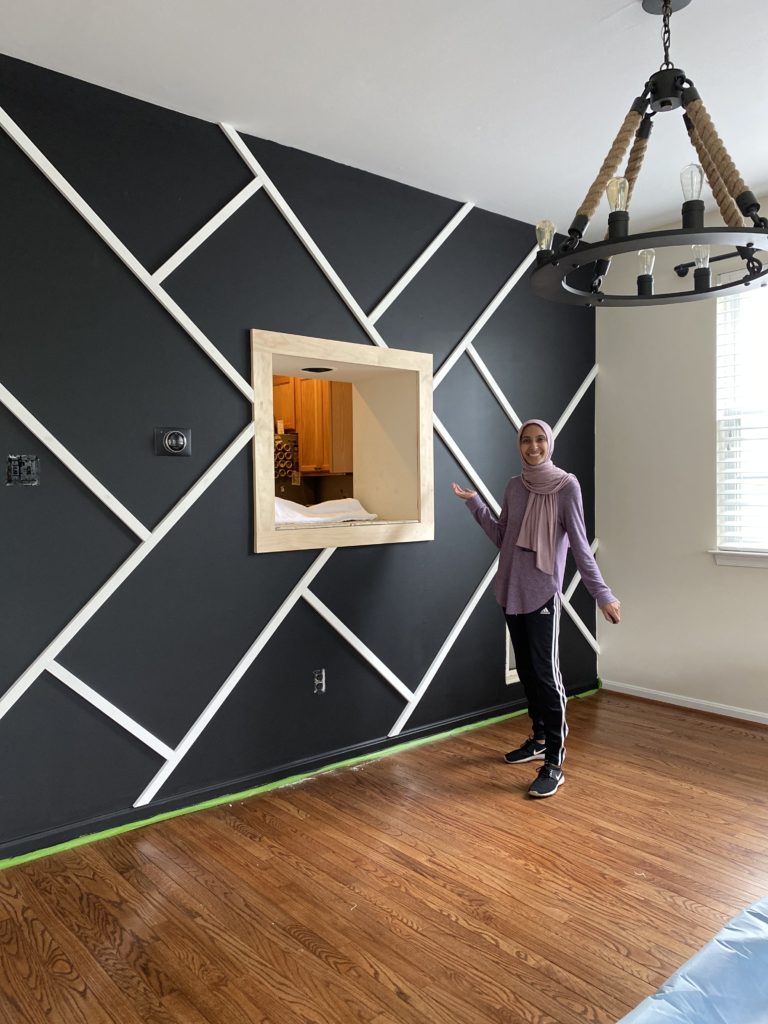
Dining Room Black Accent Wall Transformation
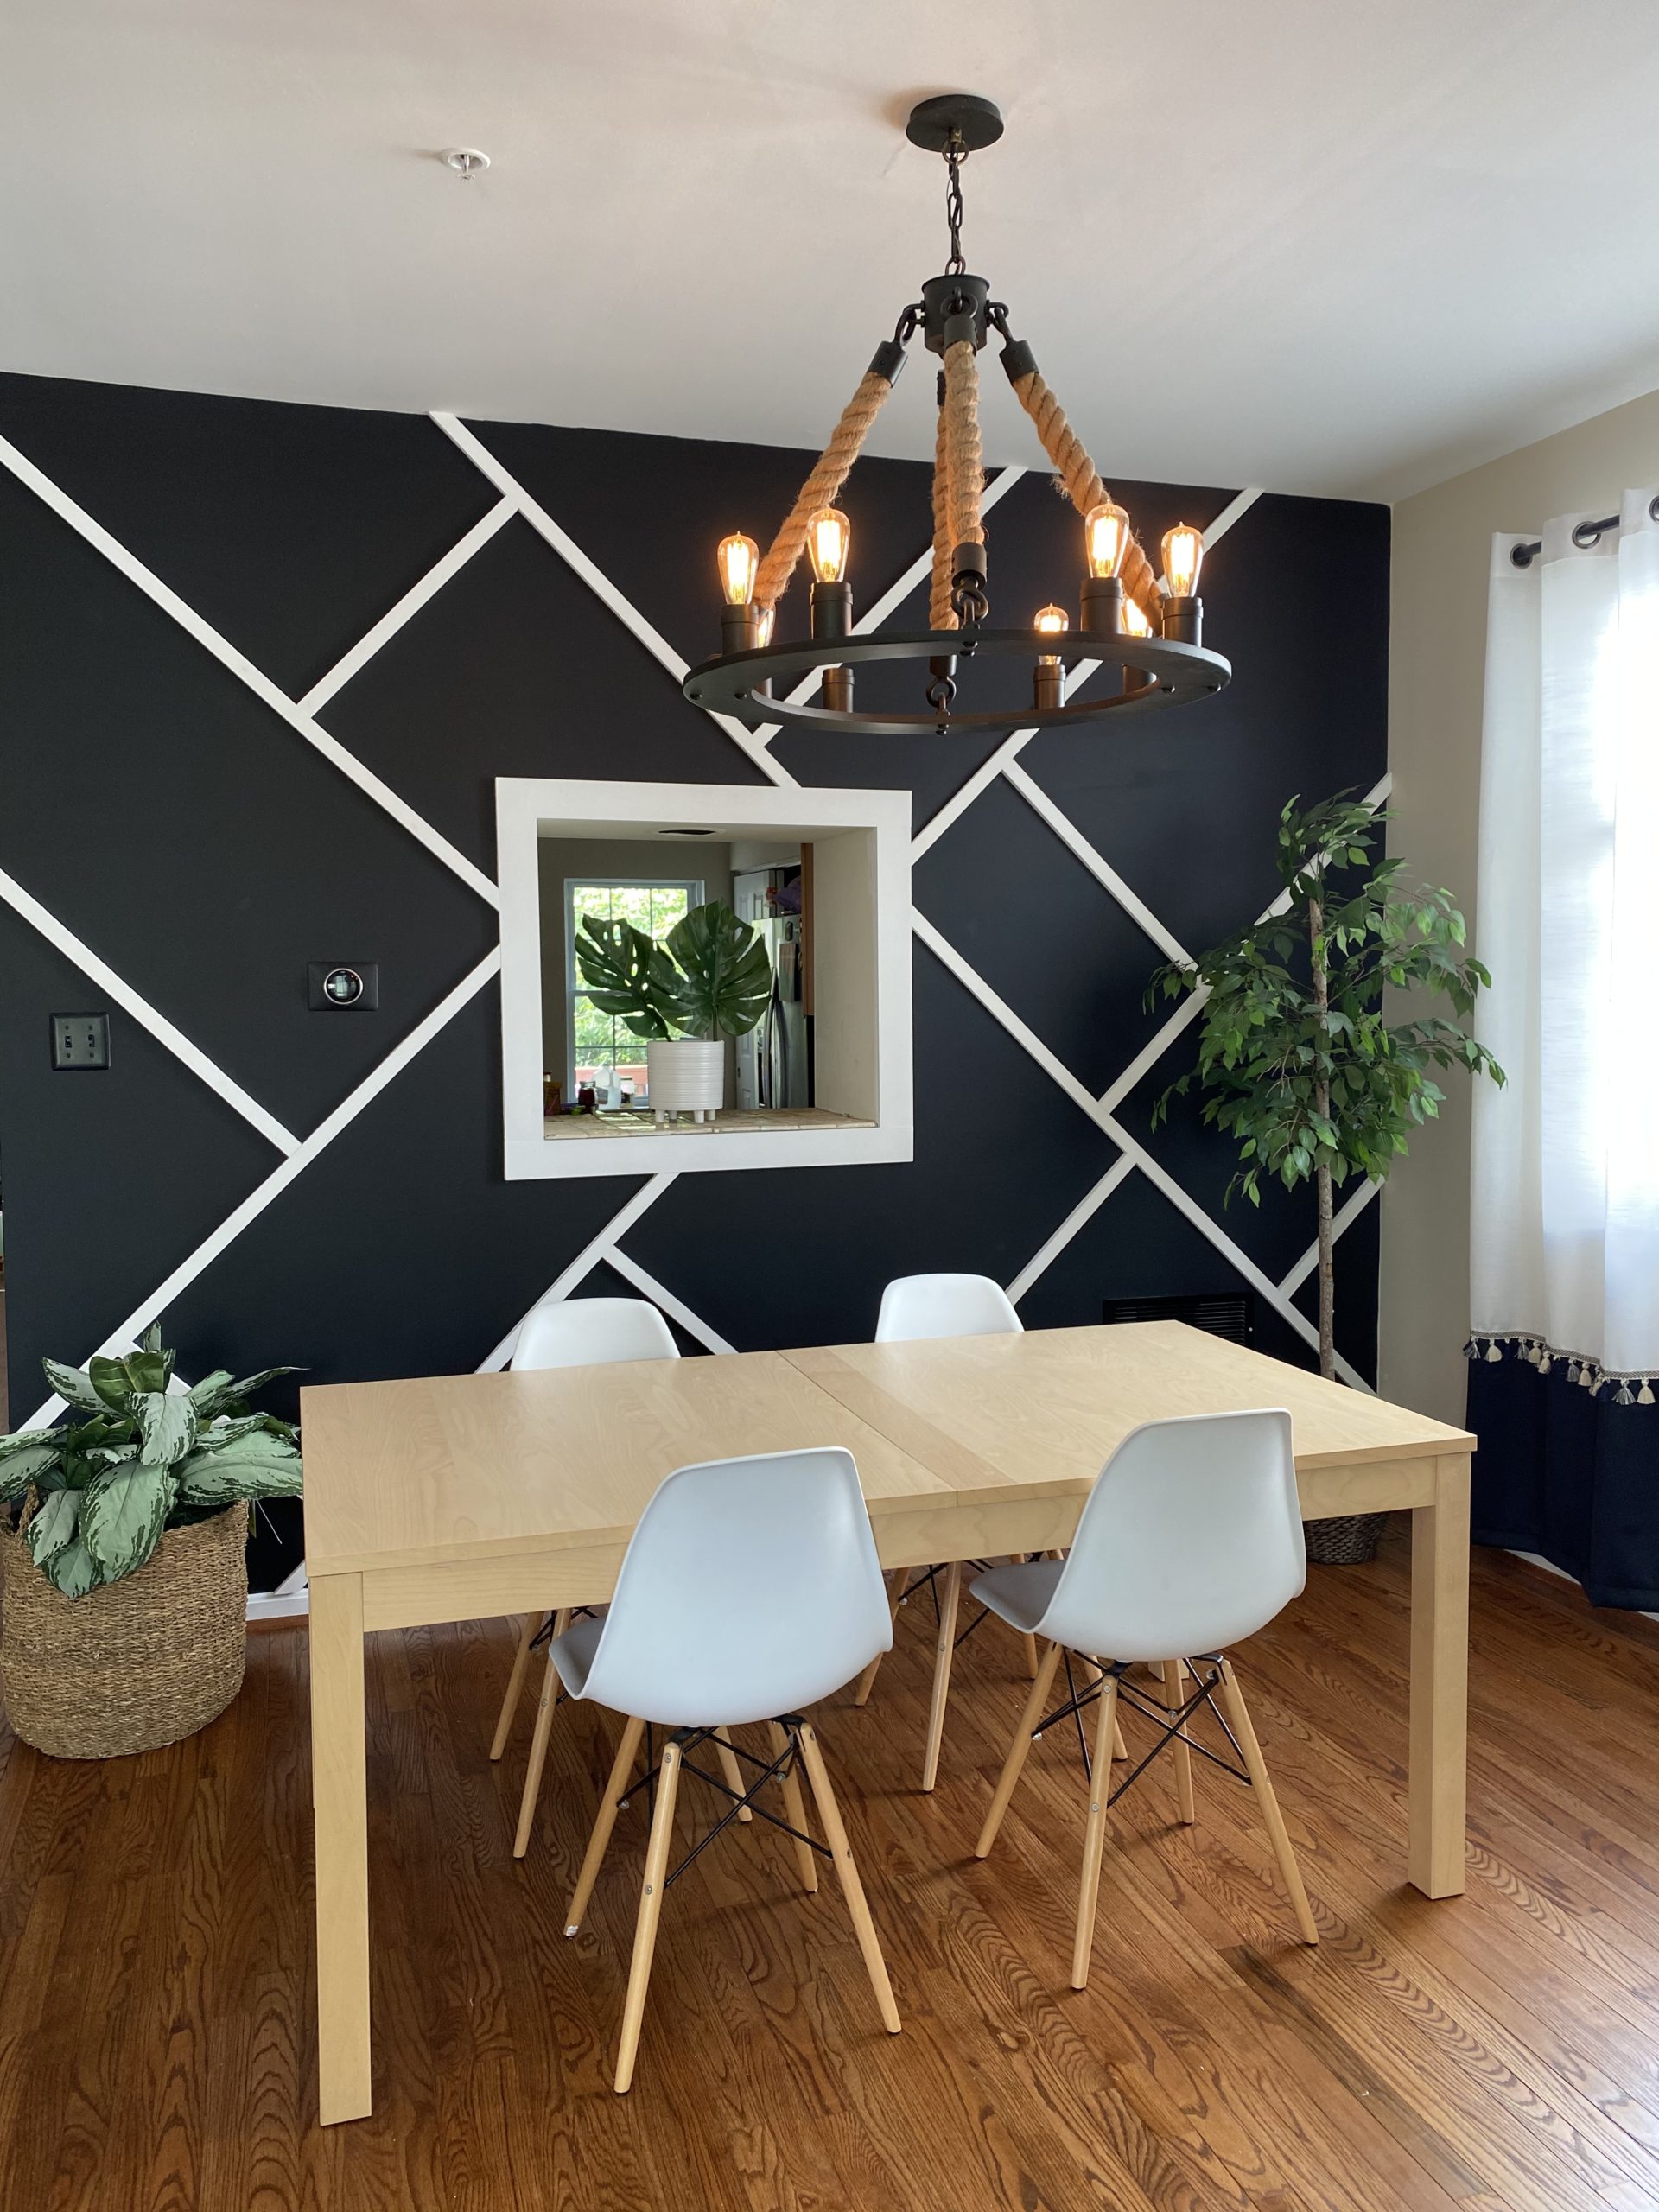
Black is the new neutral if I do say so myself! It goes with everything and can be styled in so many ways. A black accent wall can bring a modern yet chic vibe to the home and I think I did just that!
I transformed this boring old wall with a very unattractive opening in the middle. I had been thinking for so long how I can make this wall a showpiece. It is the main wall of the house and the first thing you see when you walk in.
My style is modern/rustic and minimalist. I had a bold vision for this accent wall and I knew that after it is styled, the black wall would be a showstopper. Check out how I transformed our dining room space!
Materials used:
– Behr Marquee “Black” in matte finish
– Behr “Ultra Pure White” in flat finish
– 2 1x4x8ft wood trim
– 8 1x2x8 primed MDF wood panels
– Nail Gun
– Miter Saw
– Painters Caulk
– Wood Putty (wood filler)
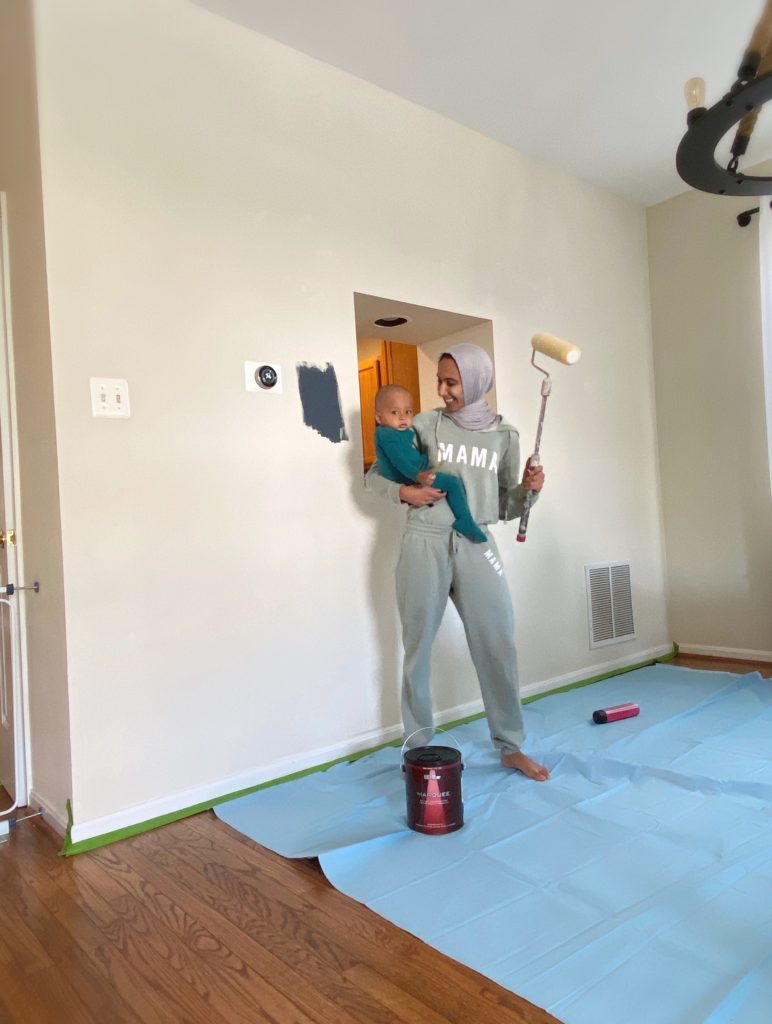
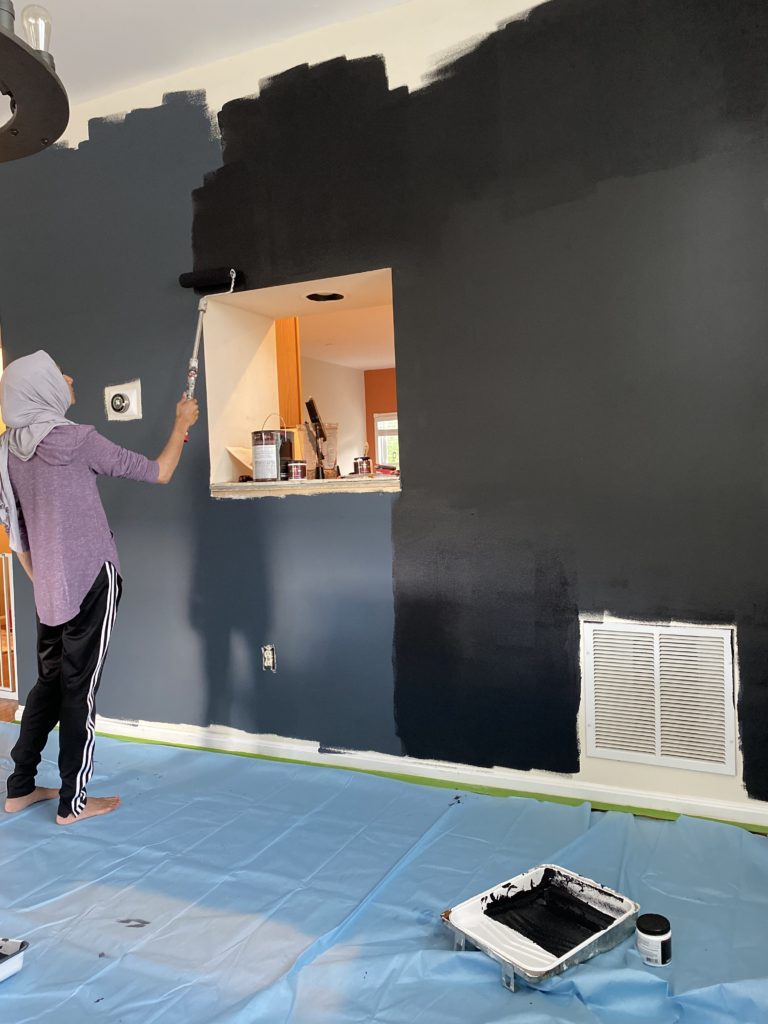
You want to start by painting the walls the night before so everything is dry before you get started. Because I wanted a seamless blacked out wall. I painted over the light switch covers, thermostat cover and the vent cover. It all blends so well together now! I found it easier to spray paint the covers instead of painting them so they have a cleaner finish.
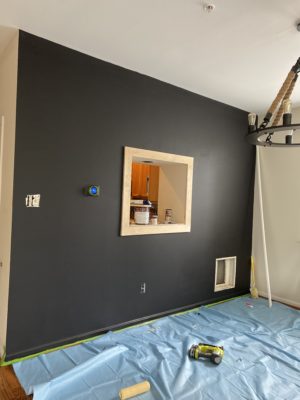
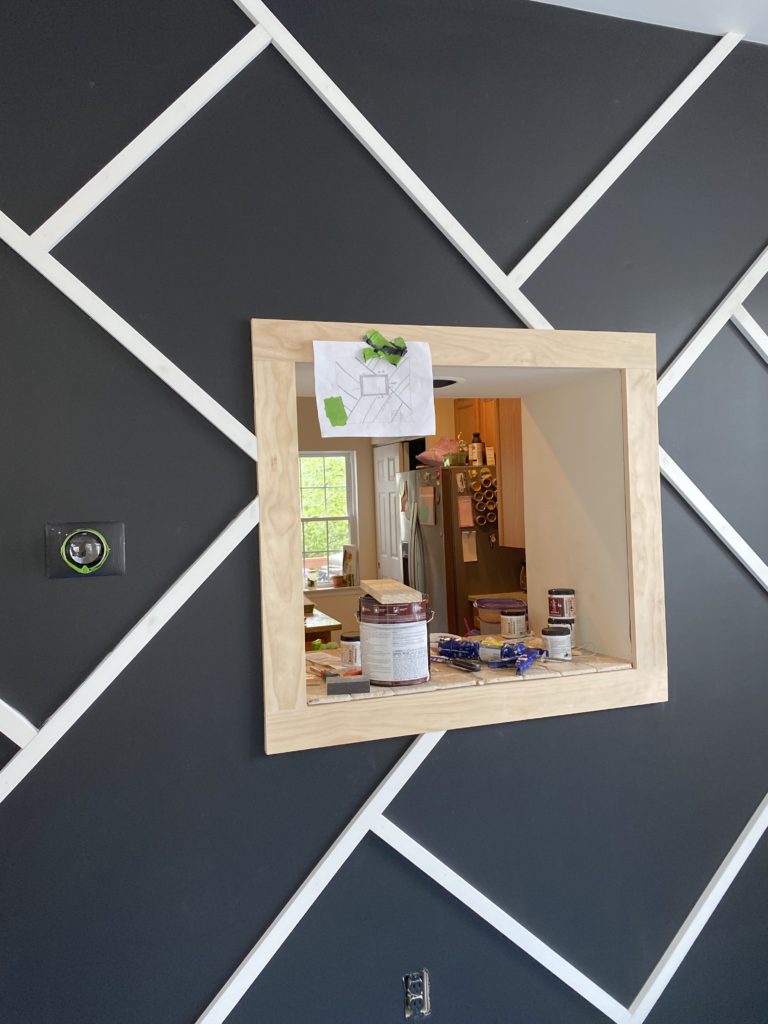
Now to the wood accent. First, I measured out the trim for the opening. I used the 1x4x8ft wood trim to frame the opening. I cut 4 pieces using the miter saw and nailed them in using the nail gun.
Now that the easy part was done. I got started with the accent wall wood trim. I used the 1×2 primed mdf trim to make the design. I started with the largest pieces first and then worked my way around. It is better to design it on a piece of paper so you have some reference of what it will look like. I didn’t stick to the exact plan as you can see. I played around with the design as it was going up and adjusted where I saw fit.
The angles of the wood were cut at 45 degrees so they would all be straight. You put the first piece down, then measure for the next, then cut and then install.
Once all the wood trim was in, the next step is to seal the sides with painters caulk. This will make the wood trim on the wall look seamless. No wall is 100% straight in any house so the chances of your wood sticking out in places is very likely. While you’re waiting for your caulk to dry, place the wood filler (wood putty) on the holes you made when nailing in the wood. When the wood filler dries, lightly sand the wood and now you’re ready to paint!
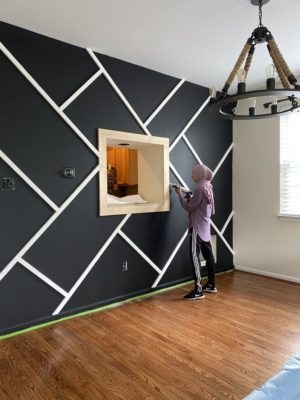
I went with the Behr Ultra Pure White and painted all the wood around the opening (3 coats were needed) and all the wood accent trim. I also repainted the bottom trim to make sure it looks seamless with the white.
And that’s the styled look! What do you think? I have to say I am super pleased with the way it turned out. It makes our living/dining room look like a luxury space.
Next on the to do list is painting the rest of the living room and putting up a gallery wall. Stay tuned for that!
Check out my other DIY home improvement transformations here