CB2 Inspired Coffee Tables

Hi friends!
It’s been a hot minute since I had any blog posts up but I am so excited get back on here! The blog has taken a back seat lately and I realized how much I miss posting in depth videos rather than a short 7 second clip on Instagram. So you’ll be hearing from me a lot more!
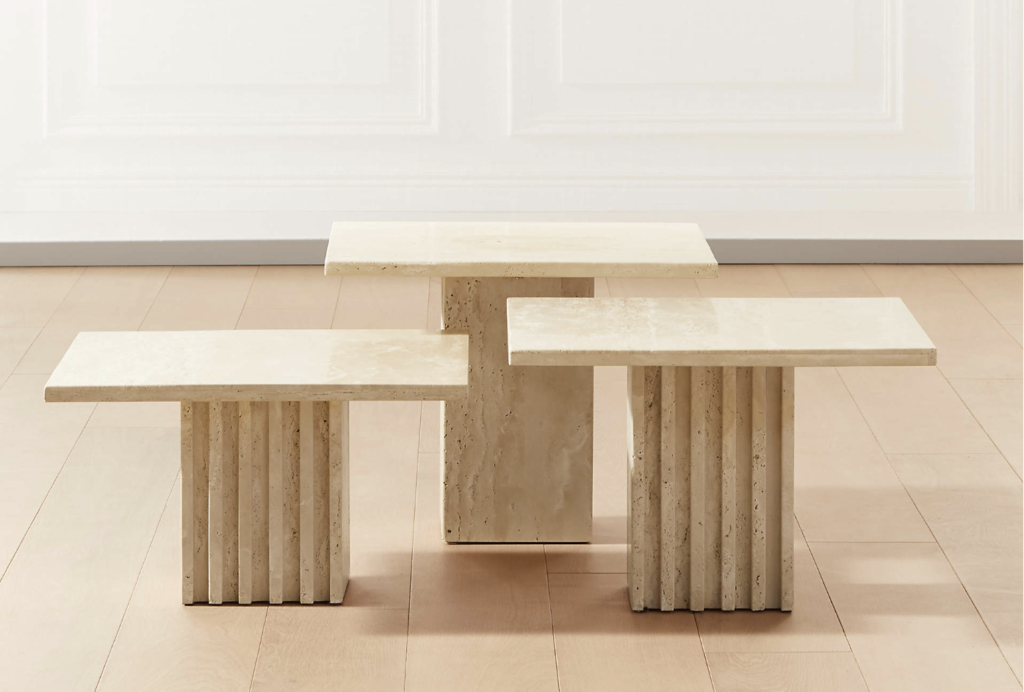
I’m thrilled to share that my first post after a 7 month hiatus will be a tutorial on these CB2 inspired coffee tables! I’ve been looking for a coffee table for my living room for months and couldn’t find something that I absolutely loved until I saw the CB2 Travertine Coffee Tables. They go for about $400-$450 each which is not what I wanted to pay. After staring at them for a while and reading up on the dimensions I figured I could make them.
The Inspiration
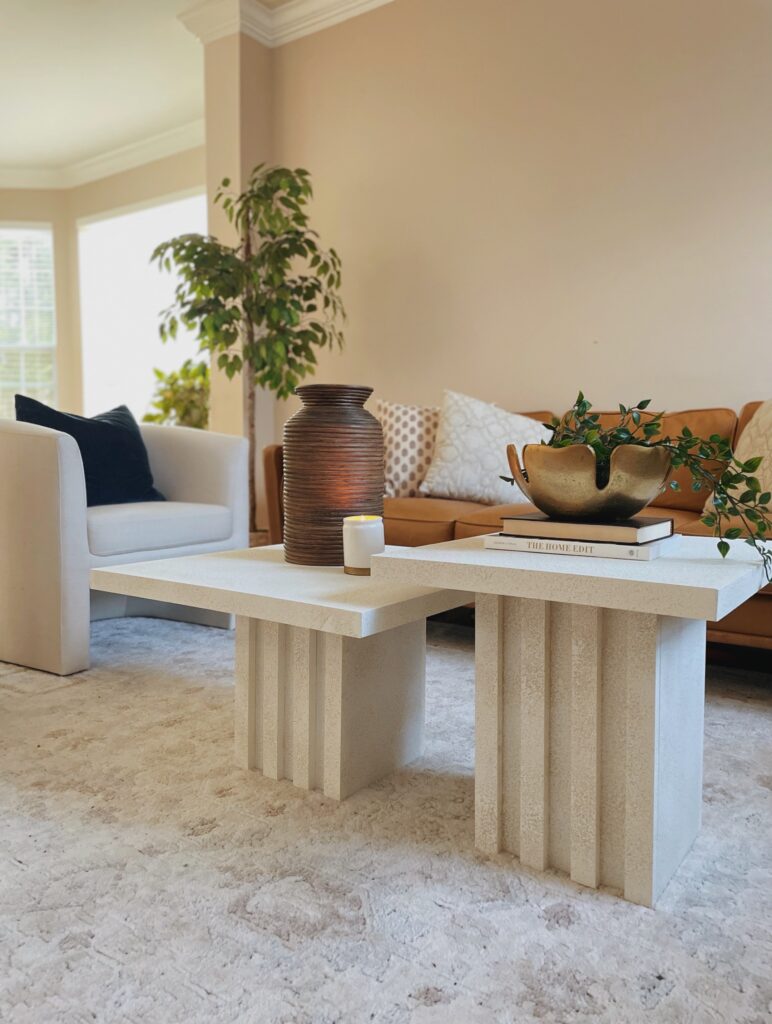
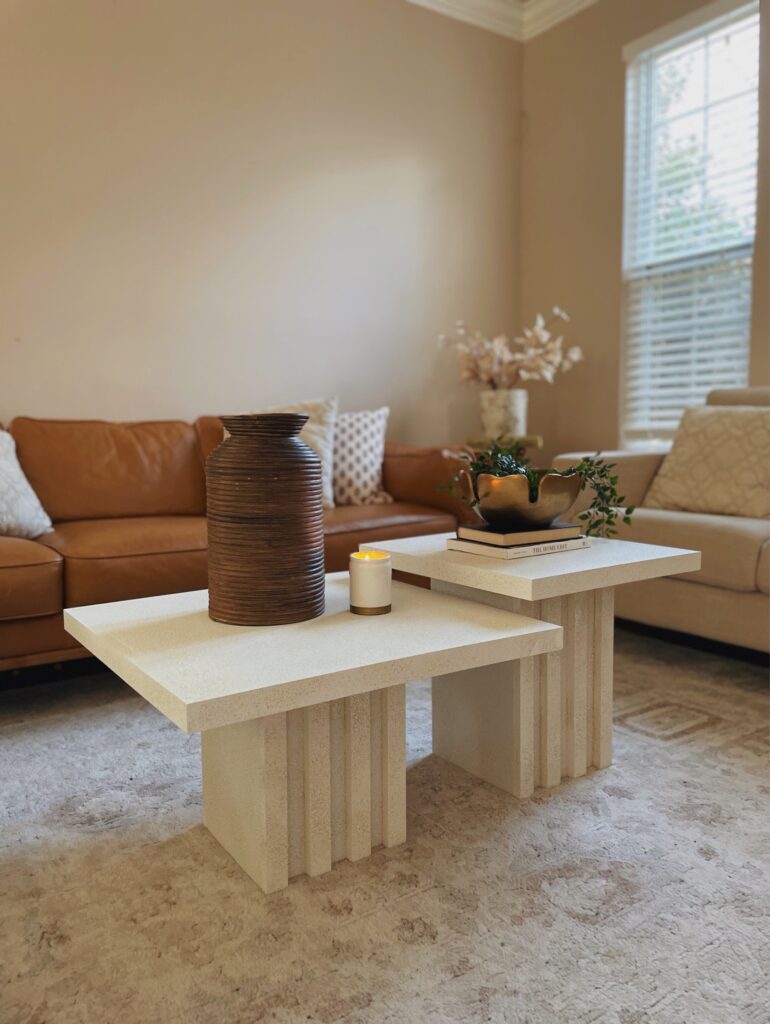
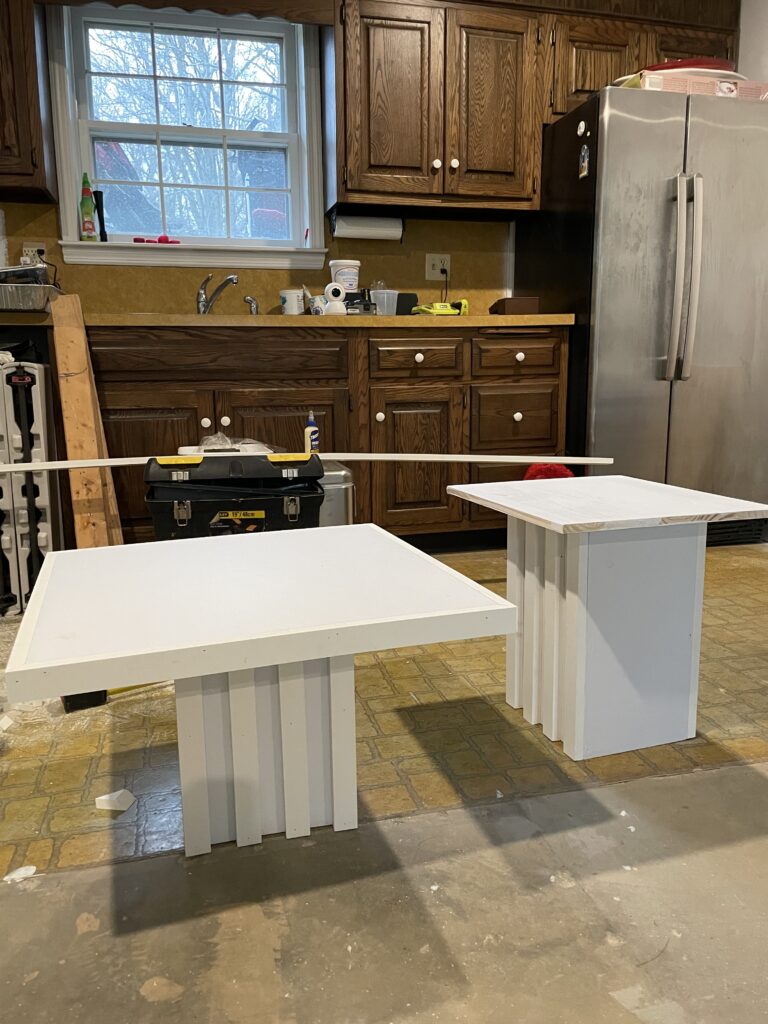
Here’s how mine turned out for only $140

I picked up all of my supplies from The Home Depot and my dad’s shed.
You’ll need:
Base for both tables– (2) 1×10 that you will cut. Four pieces will be 15″ and the other four pieces will be 18″.
Large Table Top– (1) 2×2 Sanded Plywood. This already comes in the size you need so no cutting involved.
Small Table Top– (1) 17 3/4 X 4 ft Plywood that you can find right next to the wood that is cut in a circle. This will need to but cut down to make a square. It will end up being 17 3/4 X 17 3/4.
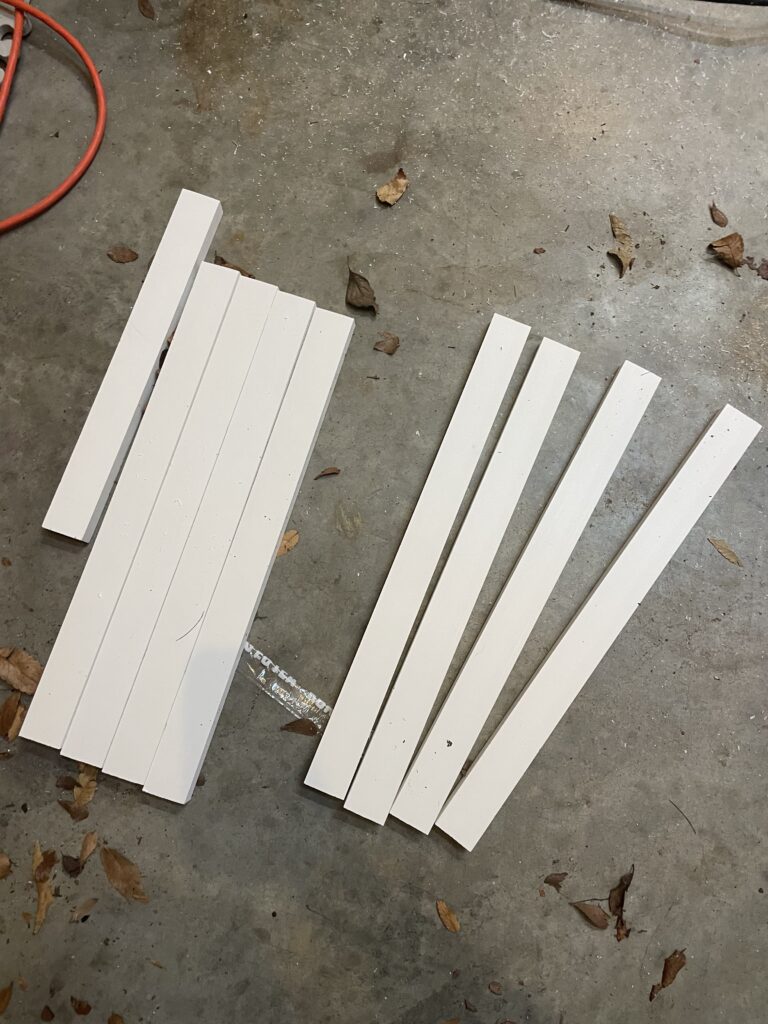
Slats and Trim– (6) This will be used to make the slats on the table bases and for the edge of the table top.
2x4x8 Board– To use inside the base for the table top to screw into
Latex Primer Paint – (1 quart) The entire needs to be primed and you will do about 2-3 coats.
Stone Textured Spray Paint– (2-3) After the primer, this spray paint will be used to give it the stone texture.
Clear Coat Spray Paint- To finish it off
Construction Screws– (1 box) To attach the wood together
Nail gun-Mostly will be used to attach the trim to the base and the trim for the table top.
Nails for Nail gun. Make sure they are 1 inch. Anything bigger will go right through the wood.
Impact Hammer and Drill bits
Foam Paint Roller
Wood Filler
Wood Glue
How to make travertine inspired nesting coffee tables
Directions:
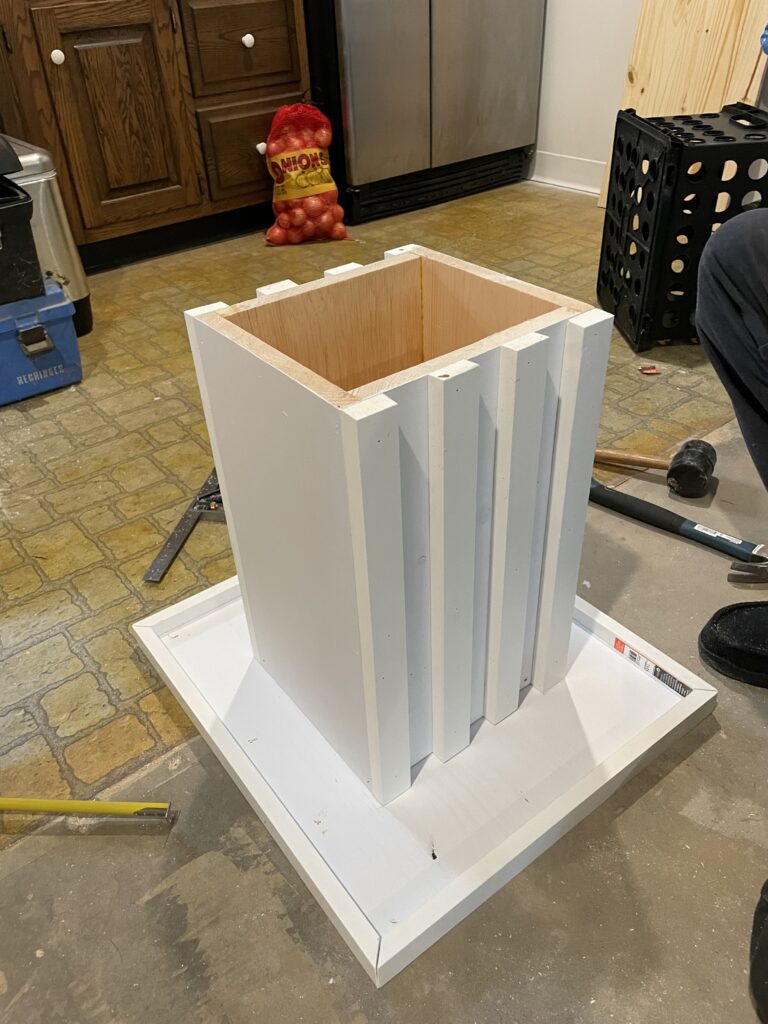
We’ll start with the bases. You will need 4 of the 1×10 wood to be cut to 15 inches and 4 will be 18 inches. Create a square with the cut wood and use the wood glue + clamps to hold them together until you have all 4 sides on. For extra stability, use 2.5″ construction screws to secure them in place.
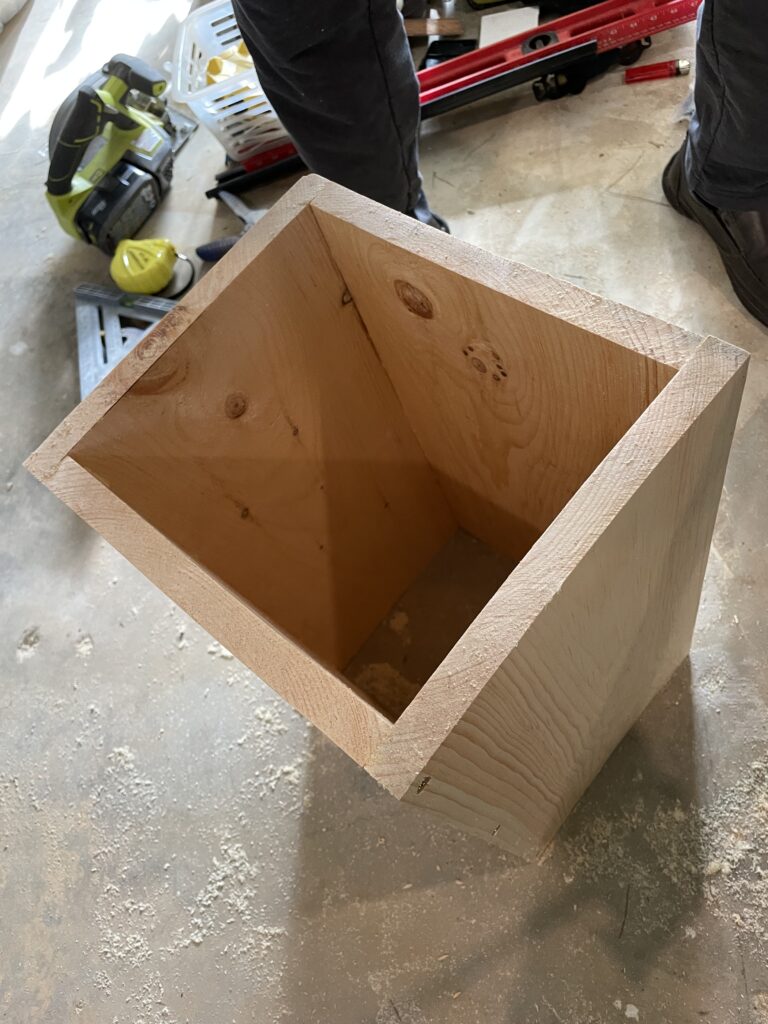
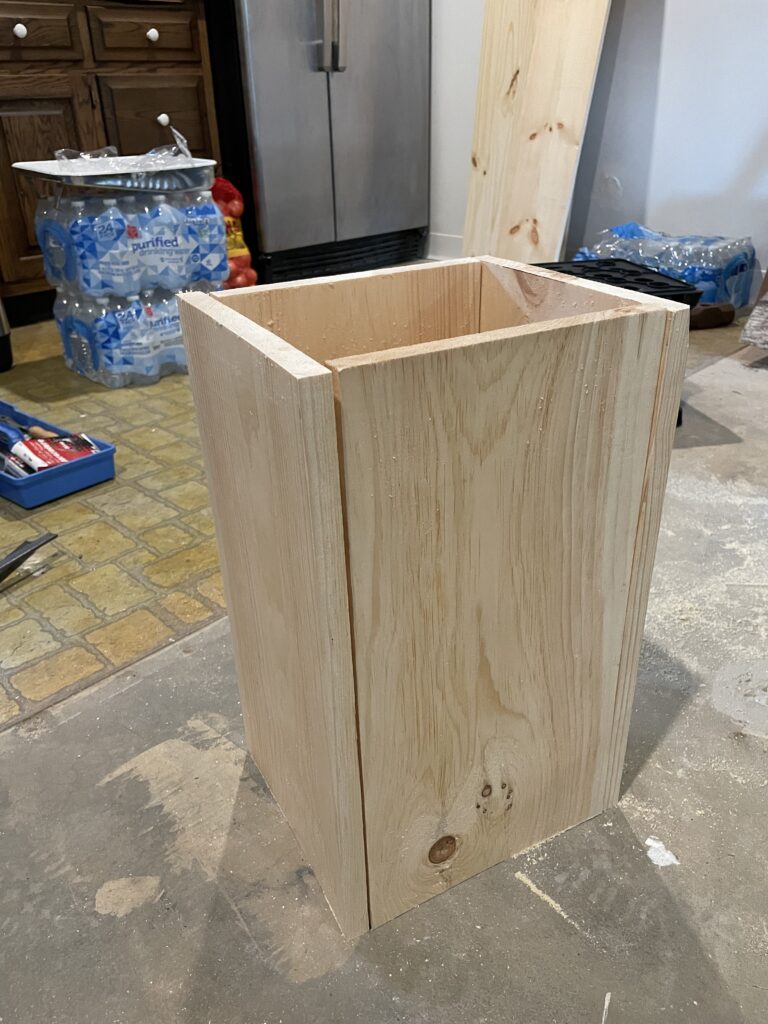
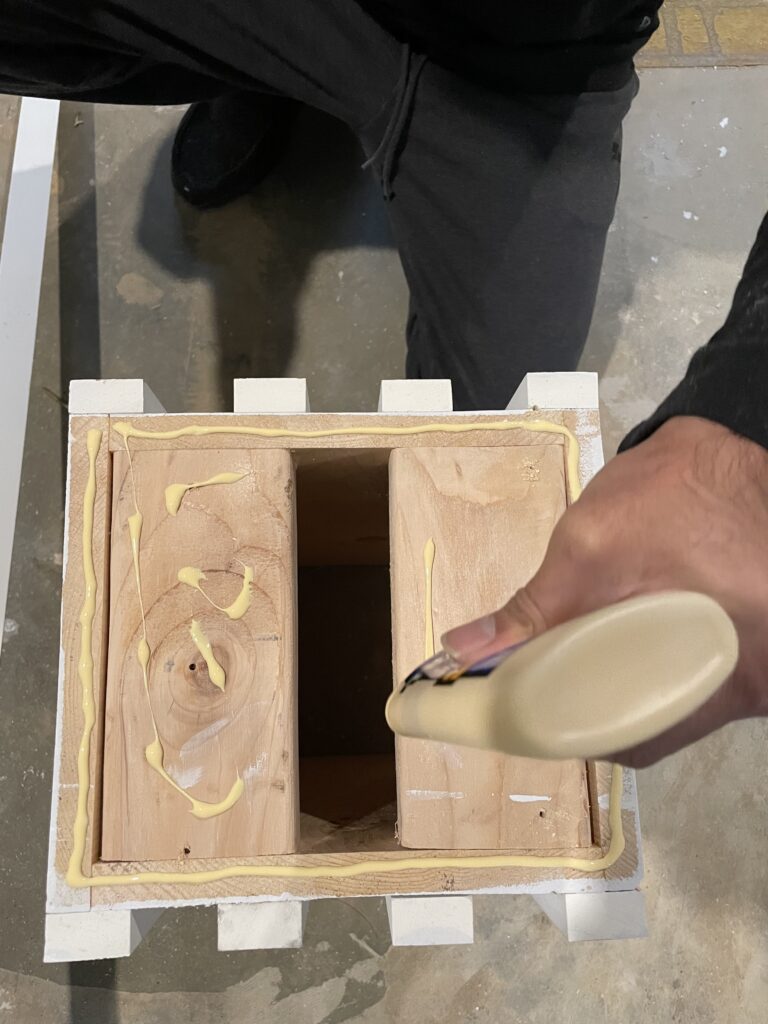
Once you have the bases set, stand it straight and measure the inside of the base from edge to edge. Cut the 2×4 wood to that size. This will be what the table top will attach to. Use the 3″ construction screws to screw in the 2×4 to the base.
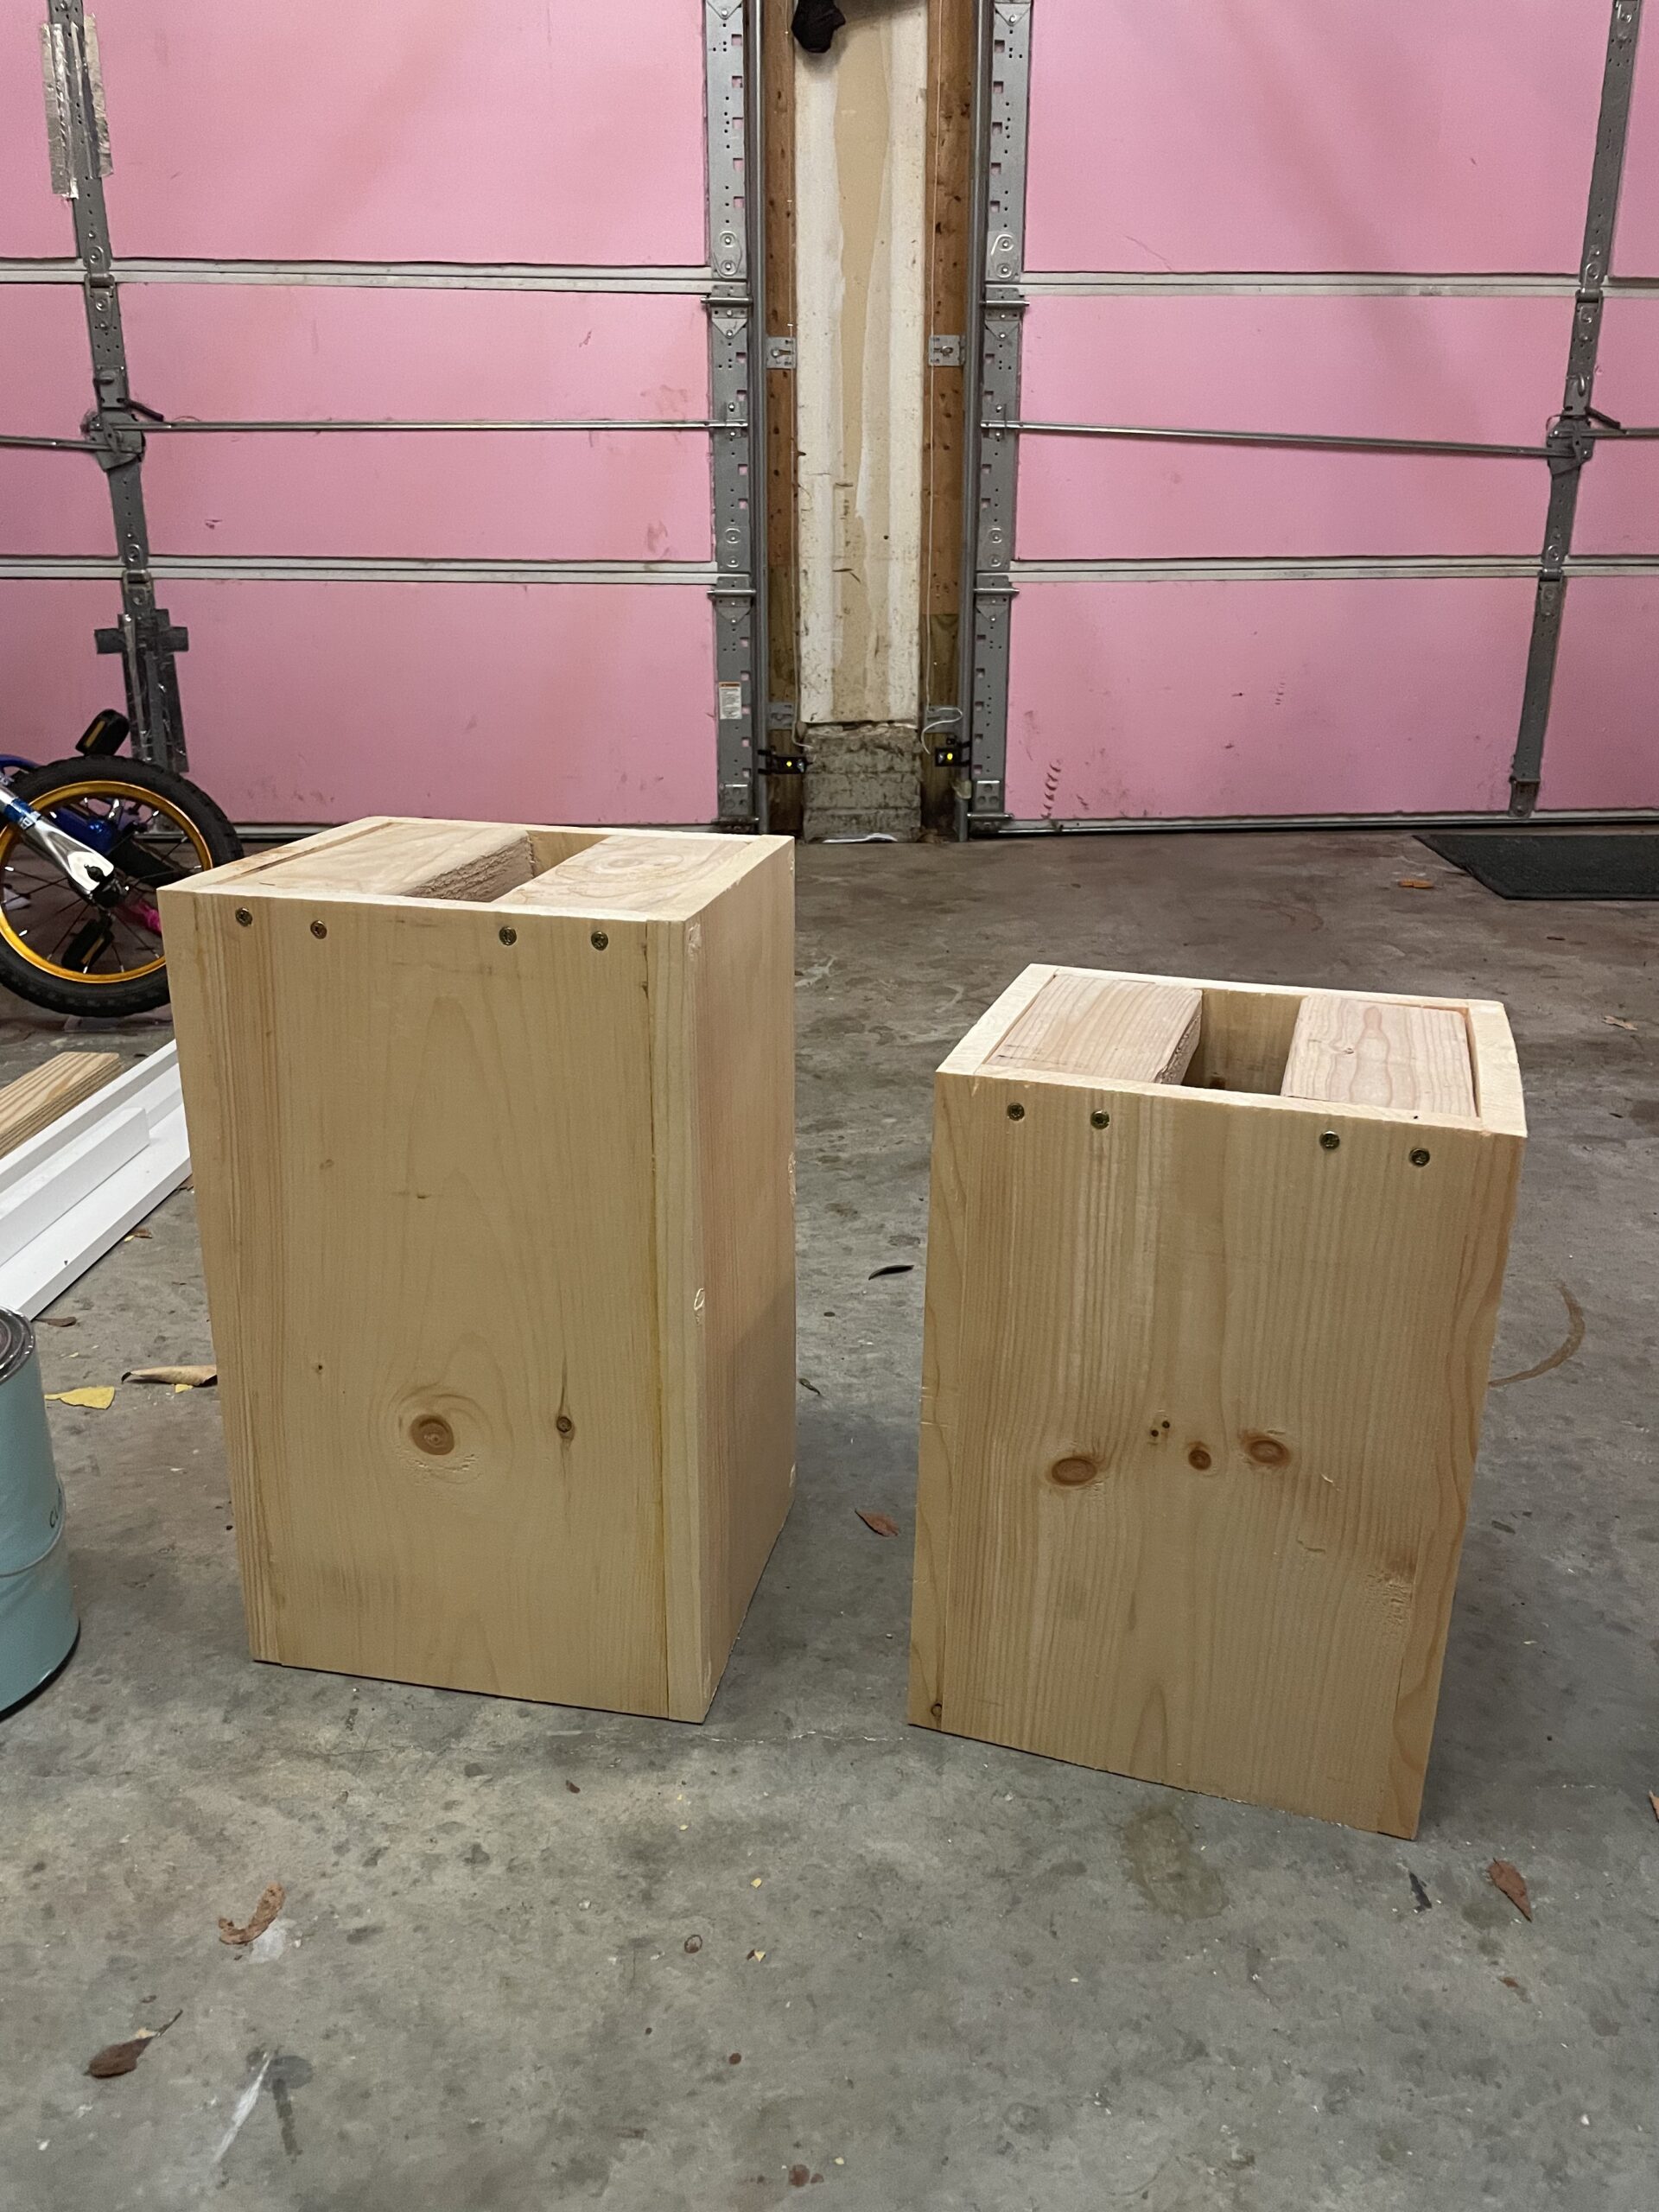
For the slats, I cut 8 of the 1×2 pvc trim to go on 2 sides. If you cut the base correctly, you will need 8 at 15″ and 8 at 18″. Measure the base before you cut the trim to make sure that the slat will be perfect. Nail in the slats to the base using the brad nailer.
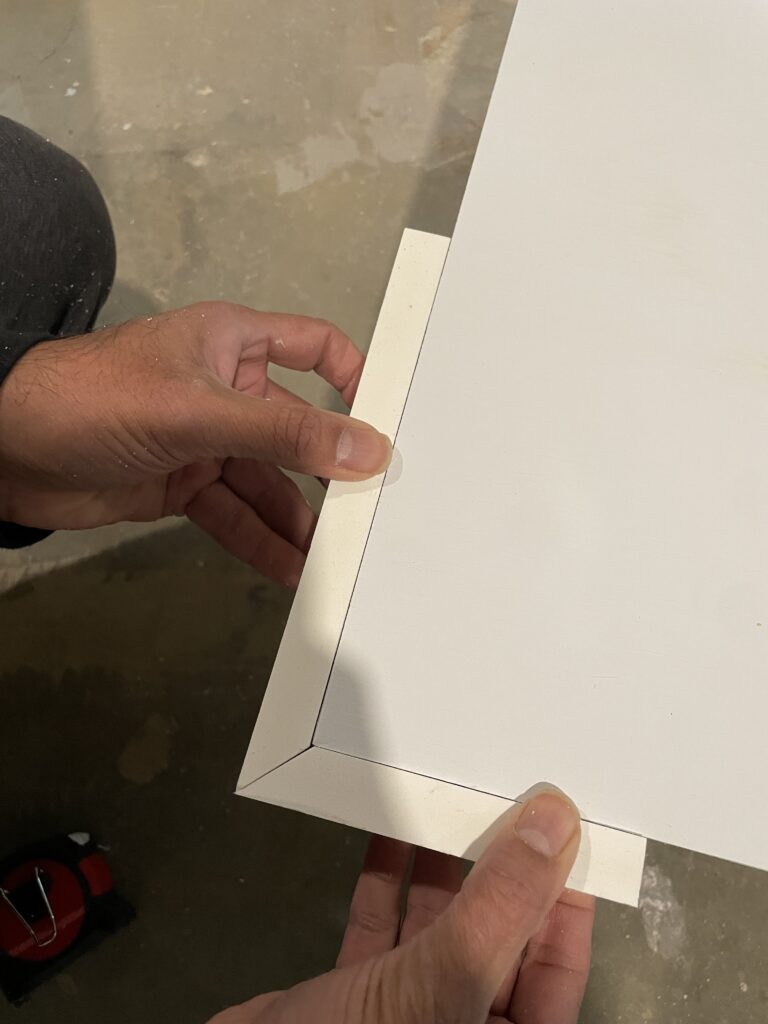
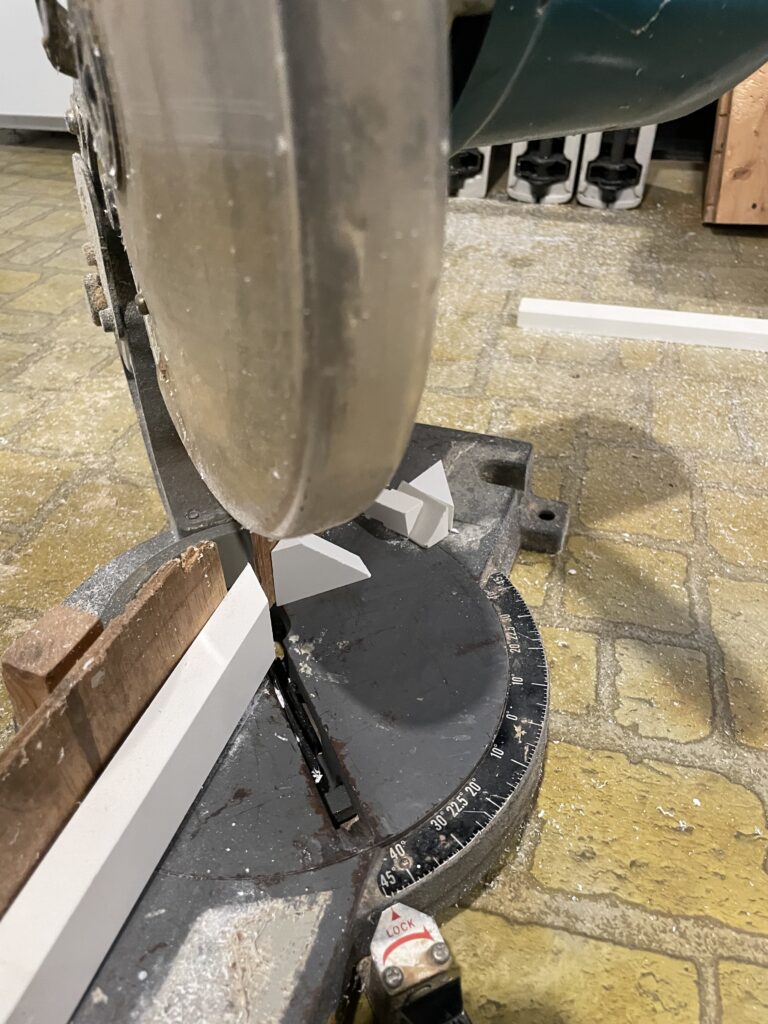
The table top is where it gets a little tricky. To give the illusion of a thicker table top without actually stacking the plywood (plywood can get super heavy when stacked) I trimmed out the edges. we cut the 1×2 pvc trim at a 45 degree miter. It’s a bit hard to explain so check out this image below. We used the brad nailer to attach the trim to the edge.
The side by side comparison makes a huge difference. Now the table top looks thick without actually being too thick. If we did not edge out the table top, it would look too fragile and will not have a clean finish.
Before assembling the table, I went ahead and primed all the pieces including the top and bottom of the table top. I did 2-3 coats and let it dry about an hour.
To assemble the table, we placed the base upside down and marked where the 2×4 stud is so when we flip it over, we know where to drill into. Flip it over and now that you know where to drill into, pre drill the holes and then use the 3″ construction screws to attach the top to the base.
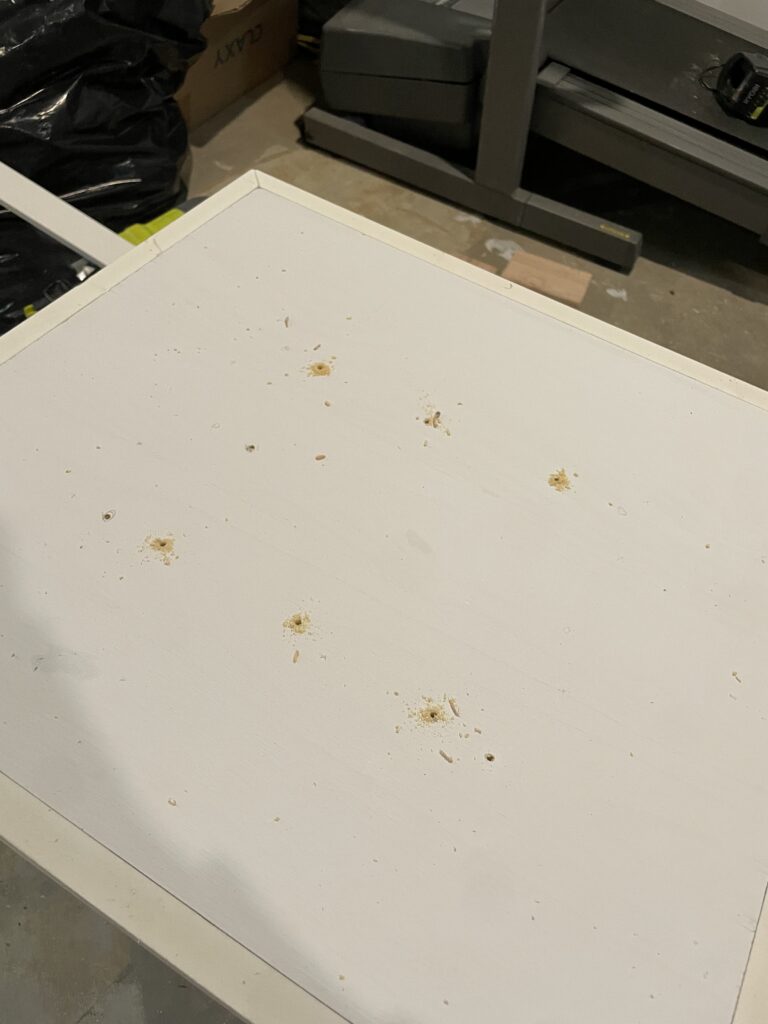
Almost done! Cover all the nail/screw holes with wood filler and wait for it to dry. It can take a couple of hours. Once it is dry, sand it using a sanding block to smooth it out. You don’t want to see any dips where the screws are or any holes from the nail gun.
Once it’s all sanded, wipe down the entire table. To give it the travertine/stone/concrete look, spray on the textured stone spray paint in a well ventilated area all over. Do it sparingly so you have an even layer and let it dry overnight. Apply 1-2 coats of the clear spray paint the next day and let it dry for a few hours.
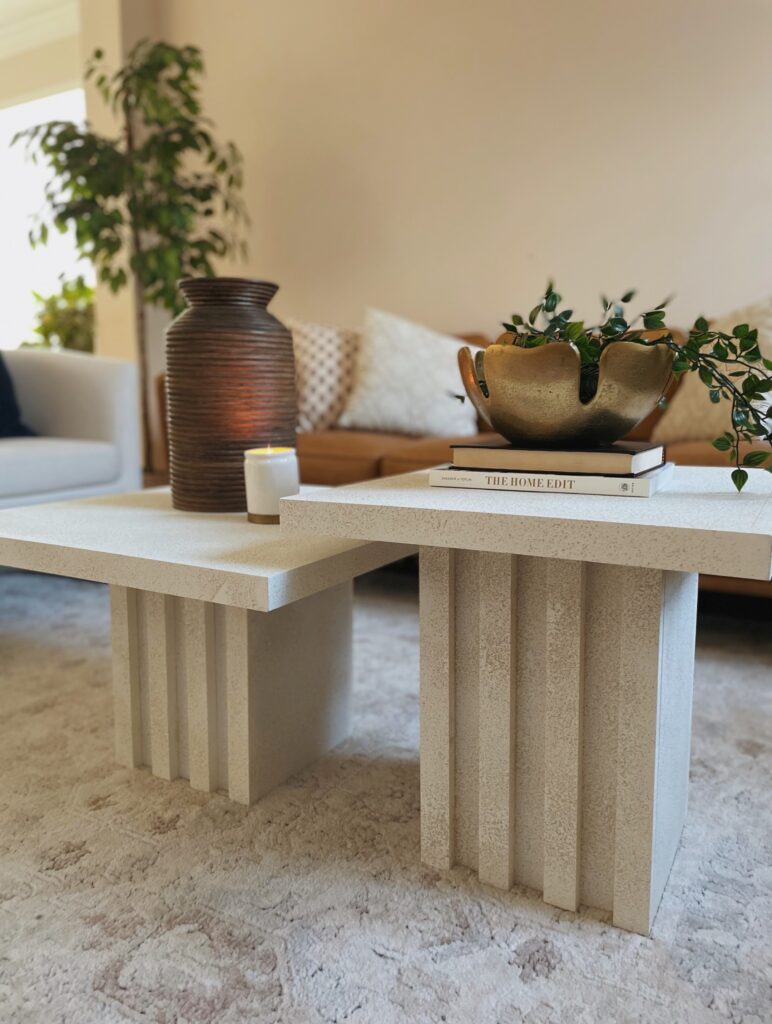
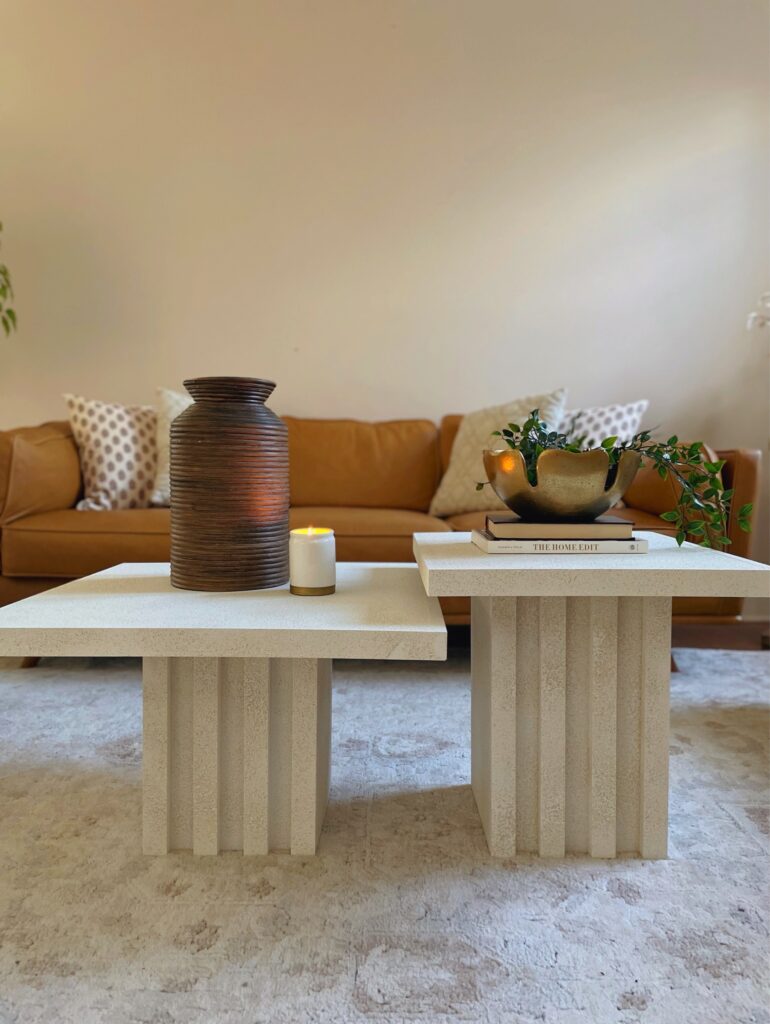
Now you have the most stunning coffee tables! It looks so real you won’t be able to tell it was a DIY!
Thank you so much for checking out the tutorial! I hope this inspired you to get started on that project you’ve always wanted to! Until next time!