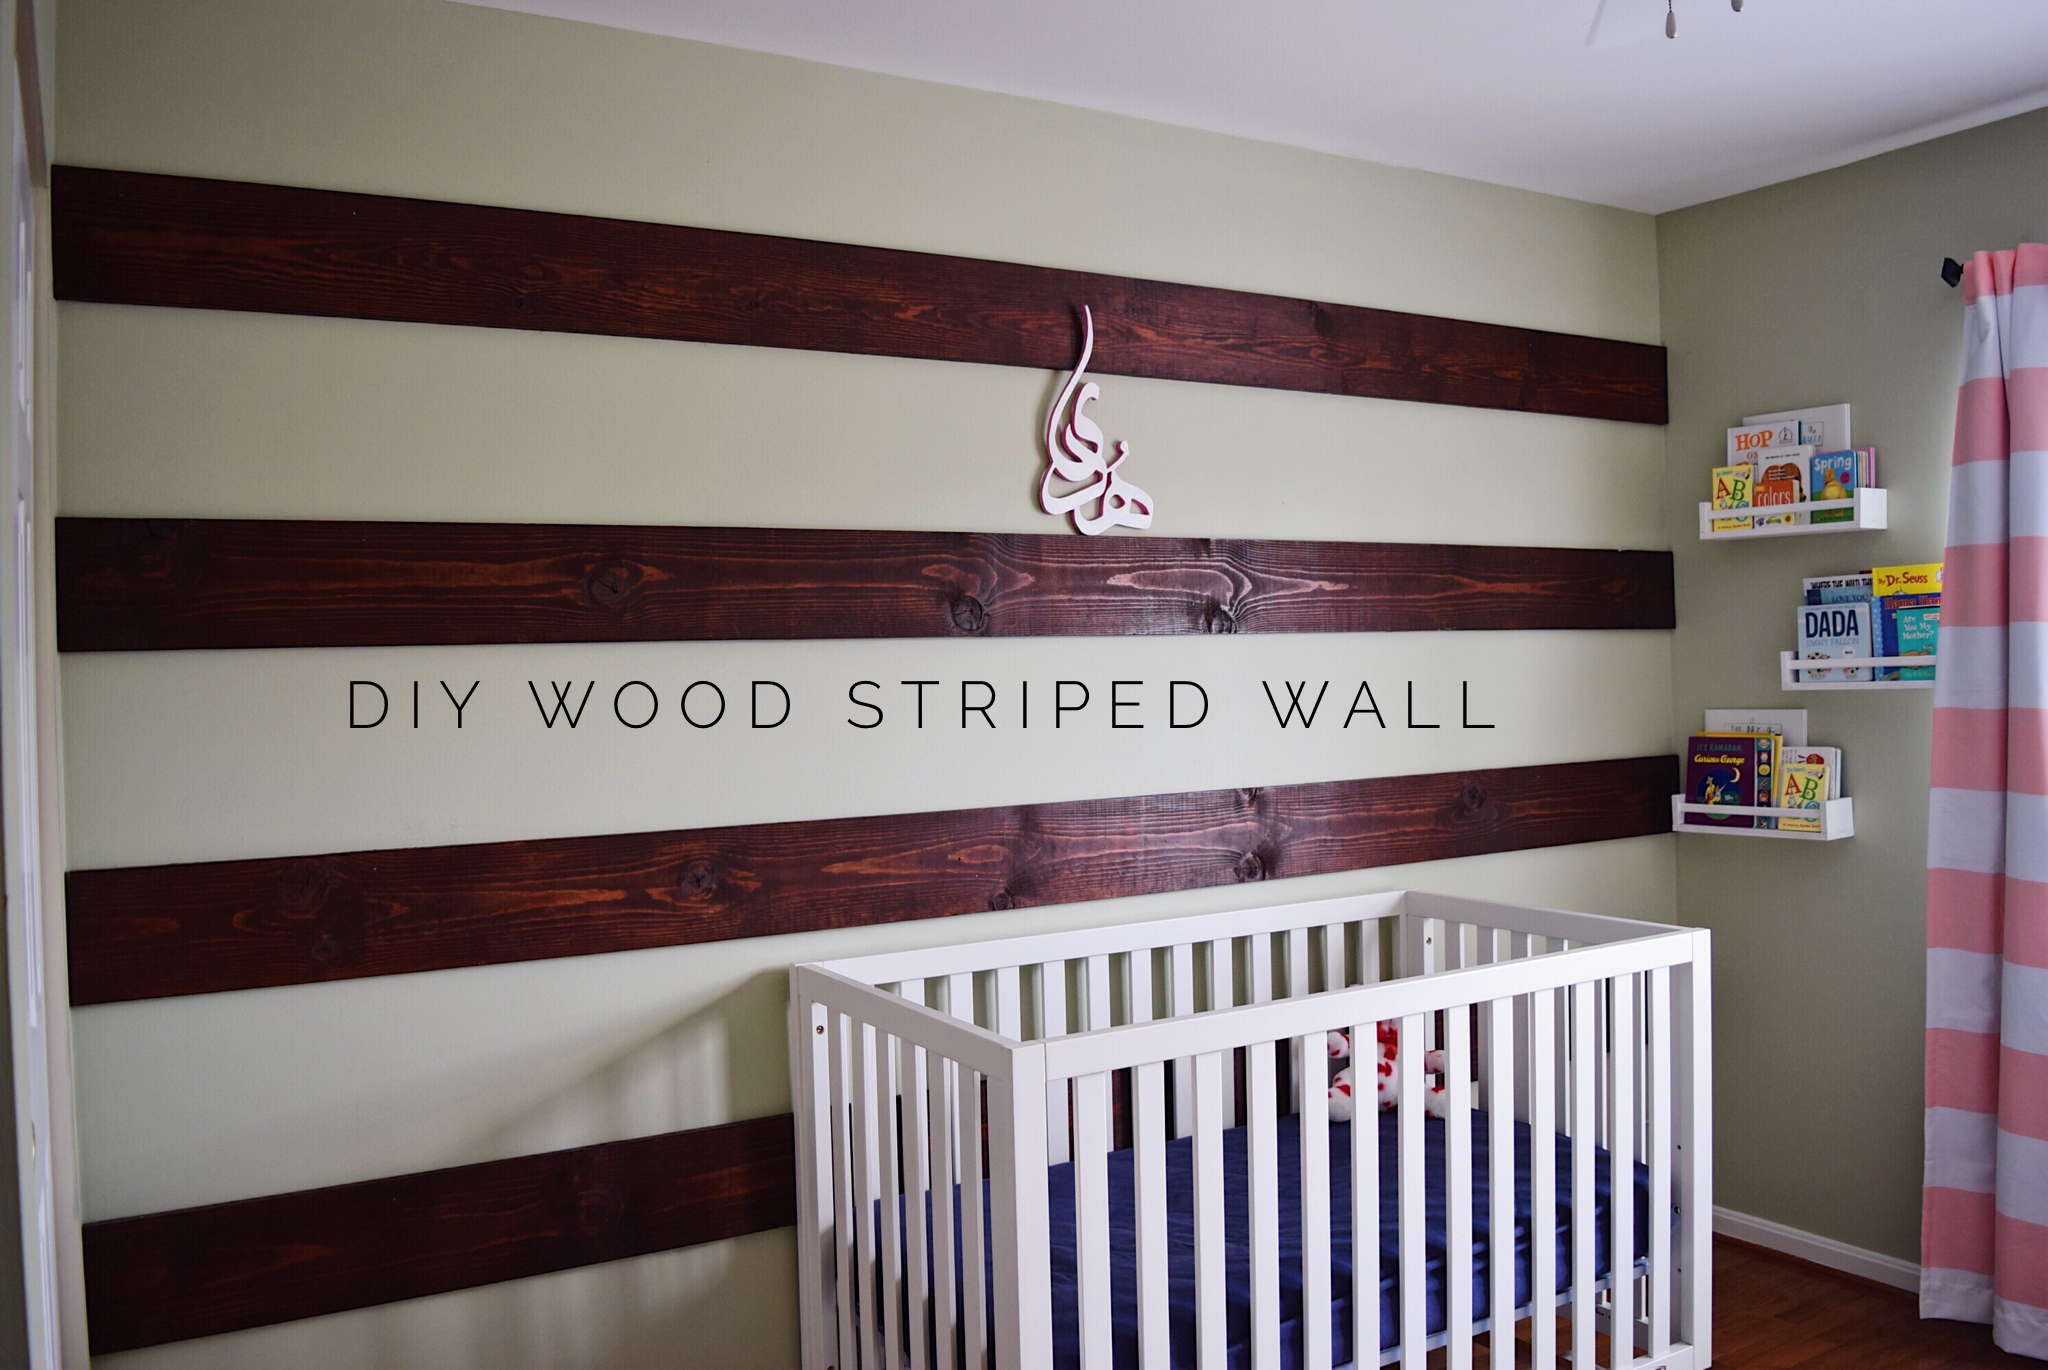
DIY Wood Striped Accent Wall
I’m so excited to finally share a PART of Hoda’s nursery that I am so proud of! The entire room has been a work in progress and I will show you the end result in another post. Hoda’s bedroom was actually complete a while ago, I just got the chance to take pics and put together all the details for you.
Today, I’m going to attempt to share with you how we put together this wood striped accent wall. It was surprisingly very easy, did not require a ton of materials, and the entire look cost less than $80!
For Hoda’s nursery I knew I wanted to do some sort of wood treatment on the walls. I based the entire design of the room on this wood wall. We kept the color palette gender neutral so it can work for anyone. I hope you enjoy this super easy and inexpensive tutorial! Keep a look out for Hoda’s nursery tour!

Supplies
1 in X 8 in X 12 ft wood boards (I used 4)
Minwax dark walnut stain
2 inch galvanized nails
First you want to measure the length of the wall you will be placing the wood on. My wall ended up being a little over 11 inches wide so I had the wood cut at Home Depot to the exact measurement.
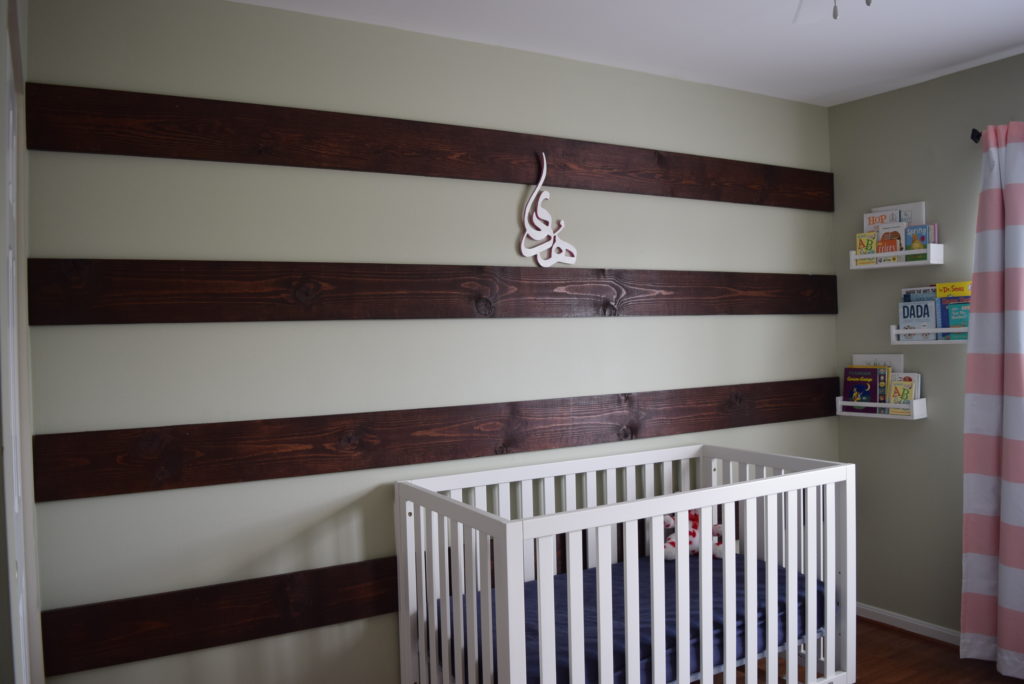
You will also need to figure out how much space to leave in between the wood planks. I started from the bottom of the wall right above the outlet. This allowed me to fit 4 planks on the wall with a 12 inch space in between each plank. These two steps are the most time consuming because you want to make sure all the measurements and calculations are correct before you go out and buy the materials. You can place the wood planks closer together if you want but make sure they are evenly spaced out.
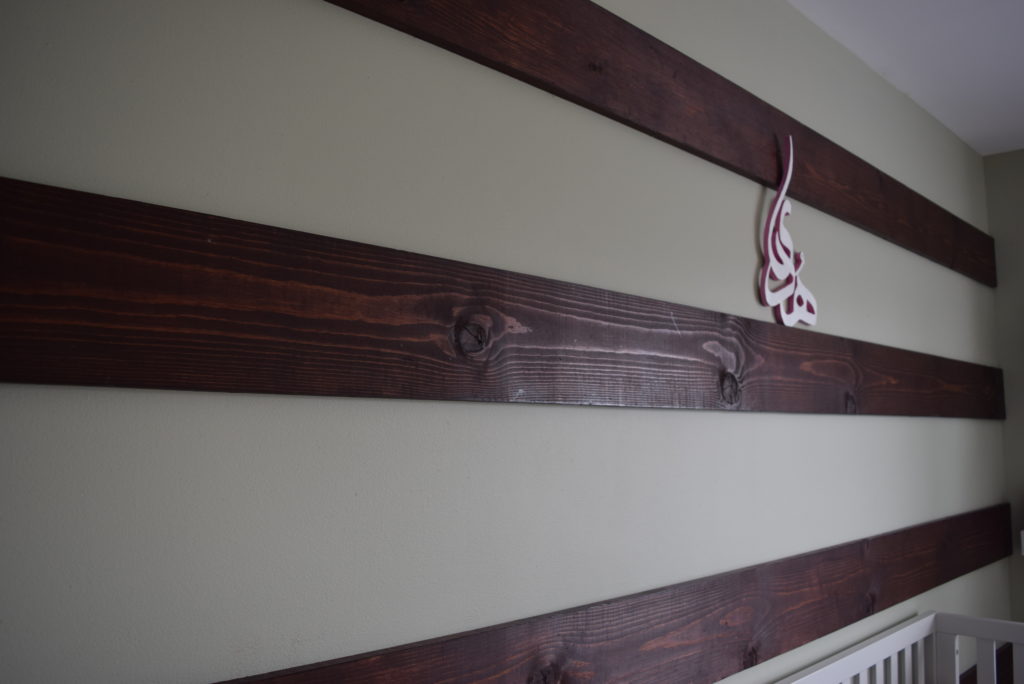
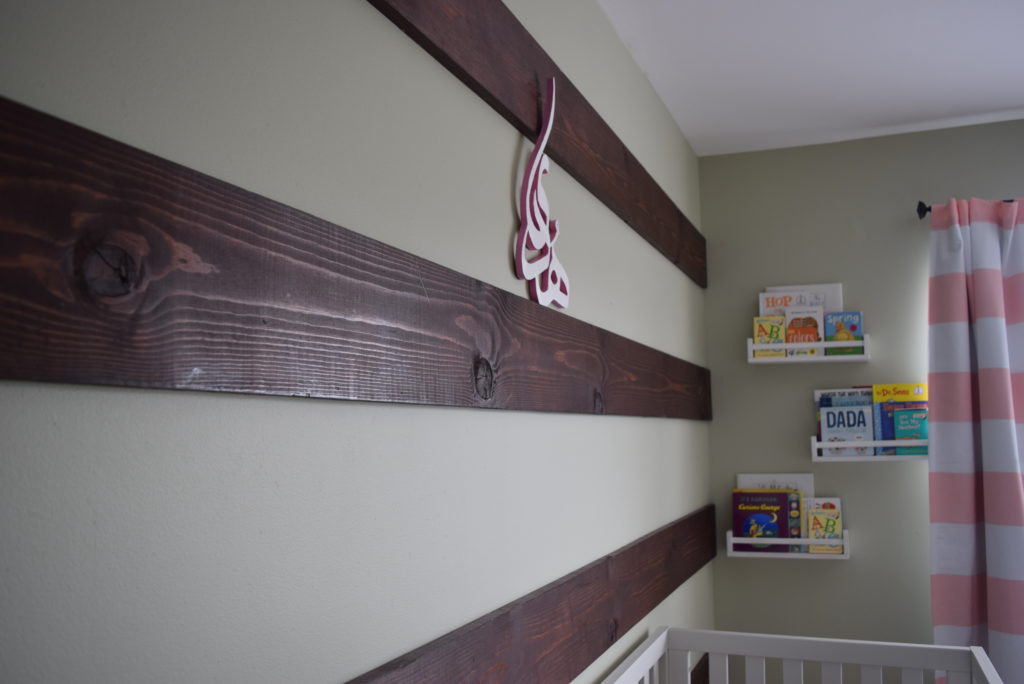
Once you have done all the calculations, you will need to stain the wood. We used the Minwax deep walnut stain with a stain brush. Make sure to get the sides of the wood, you don’t want to leave that bare as it will show when its up on the wall. This step took approximately 15-20 min. We left it to dry over night. You do not need to add a stain finish since you won’t be using it like a you would a dining table.
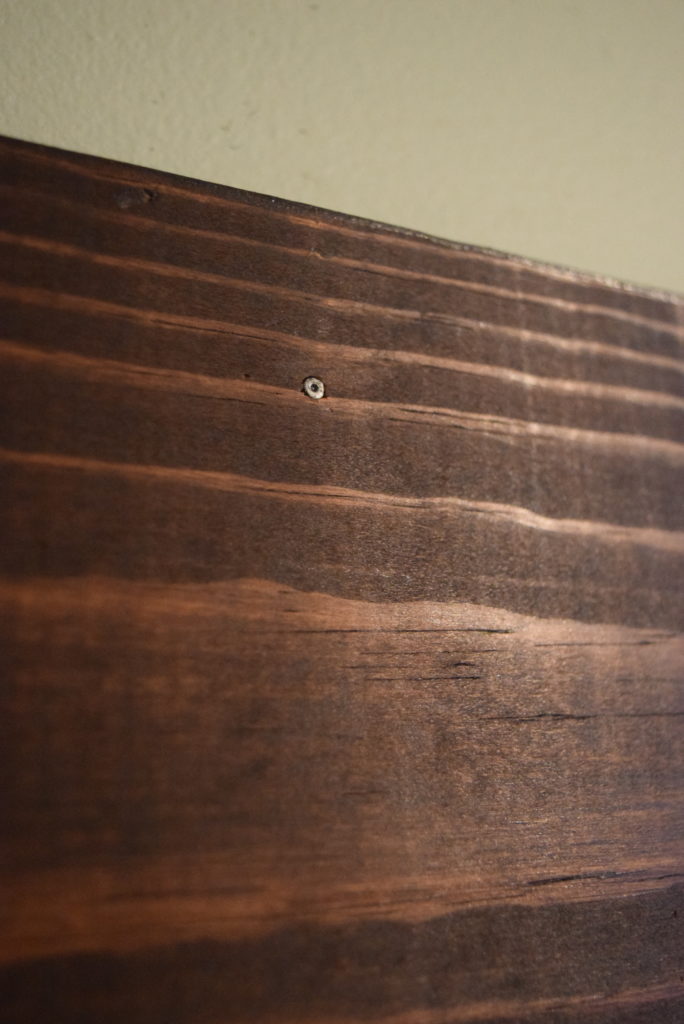
The next step is to nail them into the wall! We used 2”galvanized nails to secure them on the wall. We used two nails on the left side and two more on the right side.
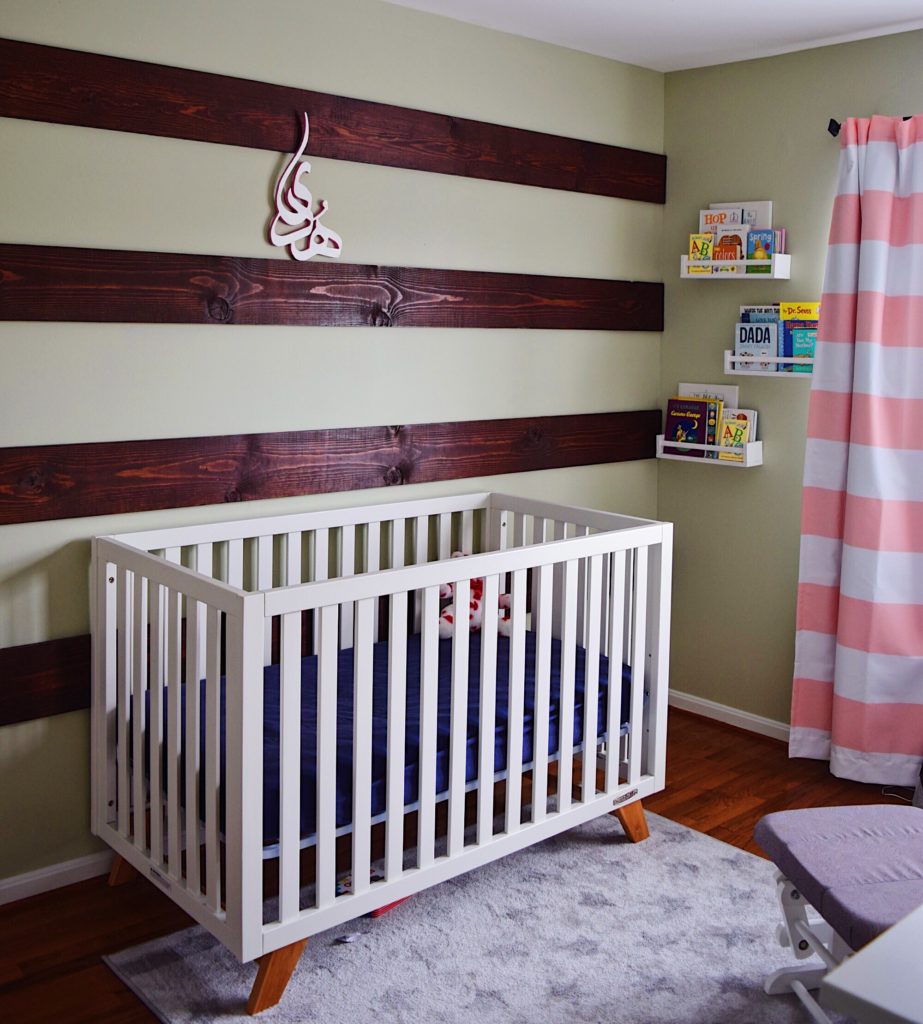
I loved how the wall turned out! It was a lot easier than I thought it would be and added character to the room. My cousin’s husband made Hoda a name sign in Arabic calligraphy that just added the perfect touch to her room!
Check out my last DIY project HERE