DIY Toddler Activity Box
Hello everyone!
I’m sure you’ve been wondering where the heck I’ve been this past month?! Well, let me give you a little update since it’s been a minute. I’ve recently started a new part-time job in my professional career which I’m absolutely loving! I’ve also been working endless nights on my full-time business, Henna Ink. It has definitely been a struggle trying to keep up with both jobs as well as being a full time mom and not to mention all the travel we’ve been doing. I’m definitely grateful for all the amazing opportunities but this mama is tired! In a couple months, things will slow down and I’ll be able to get back to regular blog posts!
Speaking of travel, we’ve been trying to enjoy the summer as much as possible by going on short trips, especially road trips. I grew up going on cross-country road trips with my family so it only makes sense to allow Hoda to have the same experience. The hubby would rather take an airplane to the destination but he seems to be getting used to the idea.
Road trips are not as easy as it looks sometimes, especially when you have a toddler who can’t sit in one place for long, let alone 8-10 hours. Finding constant entertainment for a 2 year old is exhausting so I came up with a genius idea to keep them entertained for HOURS…yes, I said hours!
I posted on my Instagram a while back showing an activity box I made for Hoda on our road trip to Myrtle Beach and then again to Toronto. I received so many requests on how to make the activity box or where to buy it and now I FINALLY have the chance to share it with you all! It was so easy to make, the hardest part was just finding the activities to put in it but I did all the hard work for you by listing it here.
Feel free to share this post with fellow mamas! Everyone can benefit from a little DIY!
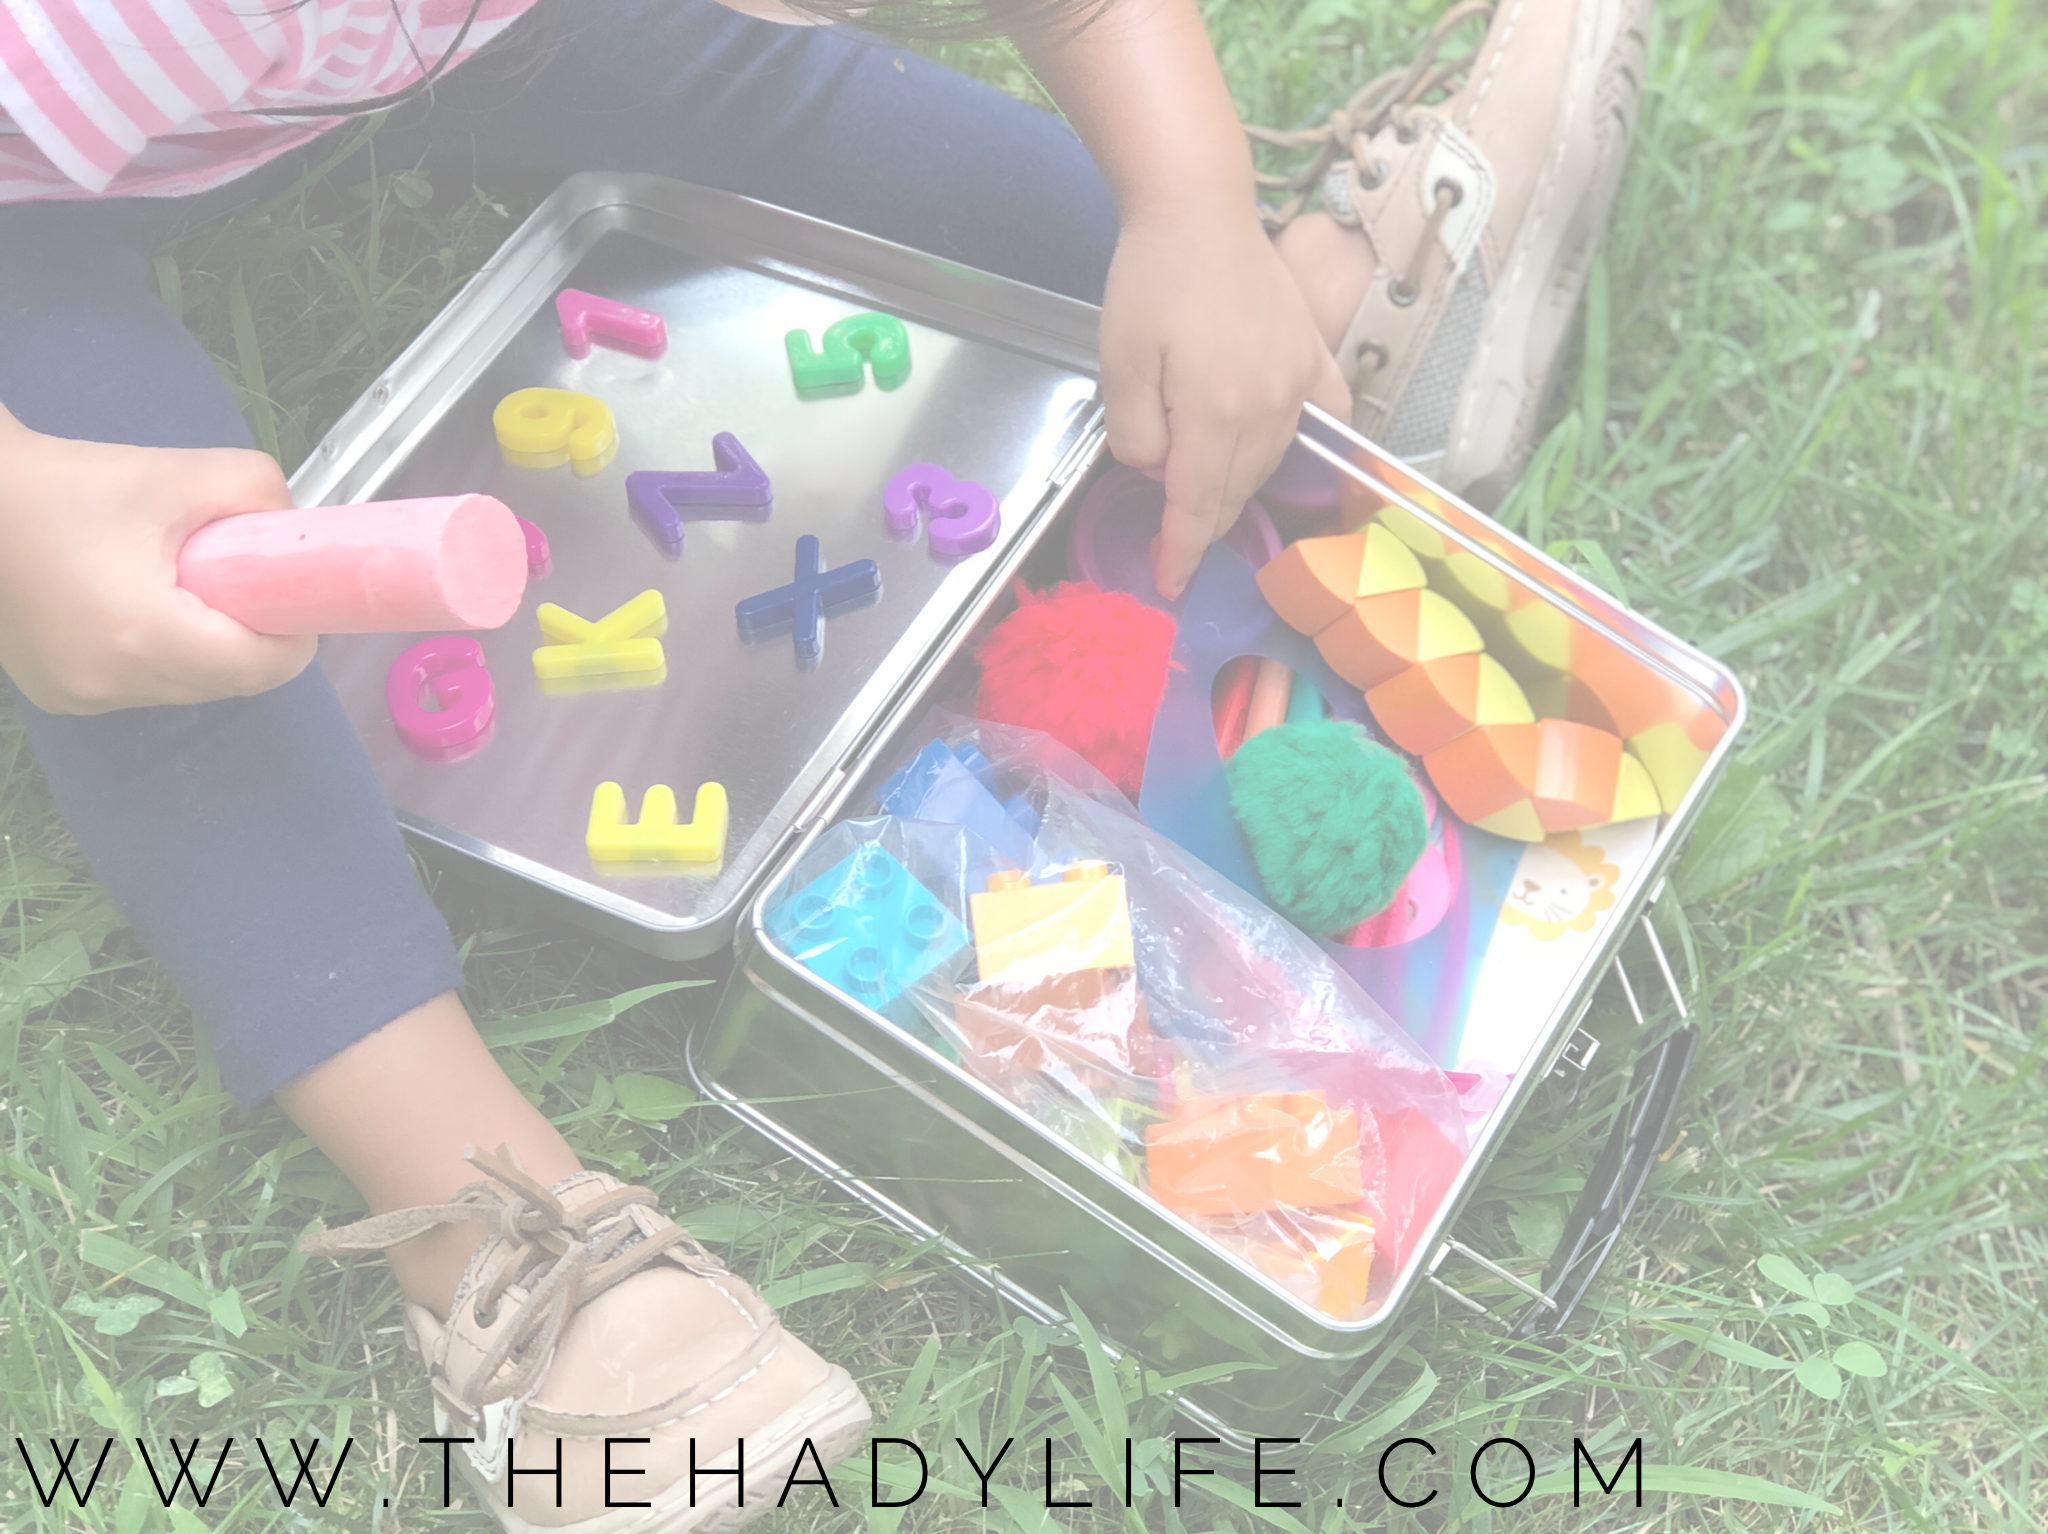
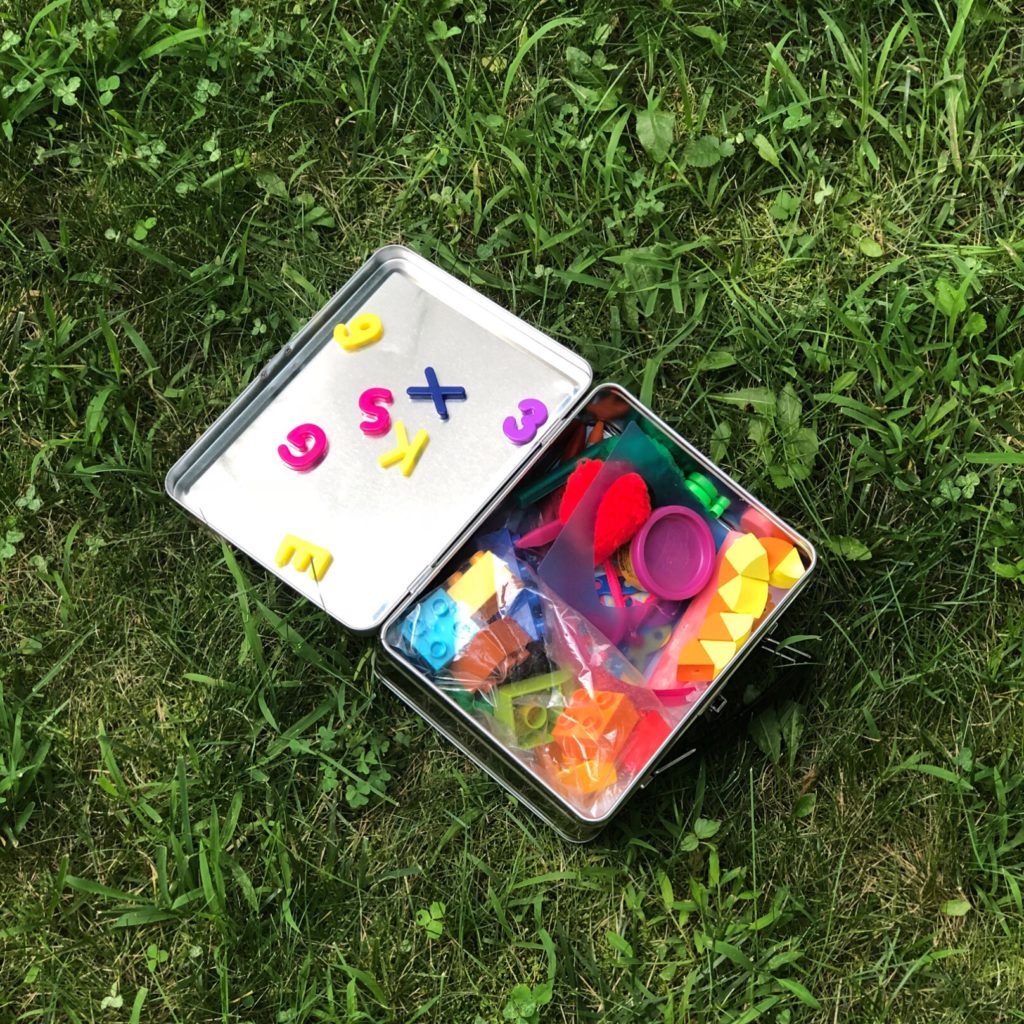
Toddler Activity Box
There are so many things you can do with the outside of the box so I decided to do a lego base on one side and a chalkboard base on the other side. Around the edges of the box, I plan to add a race track sticker so Hoda can drive her mini cars along the sides.
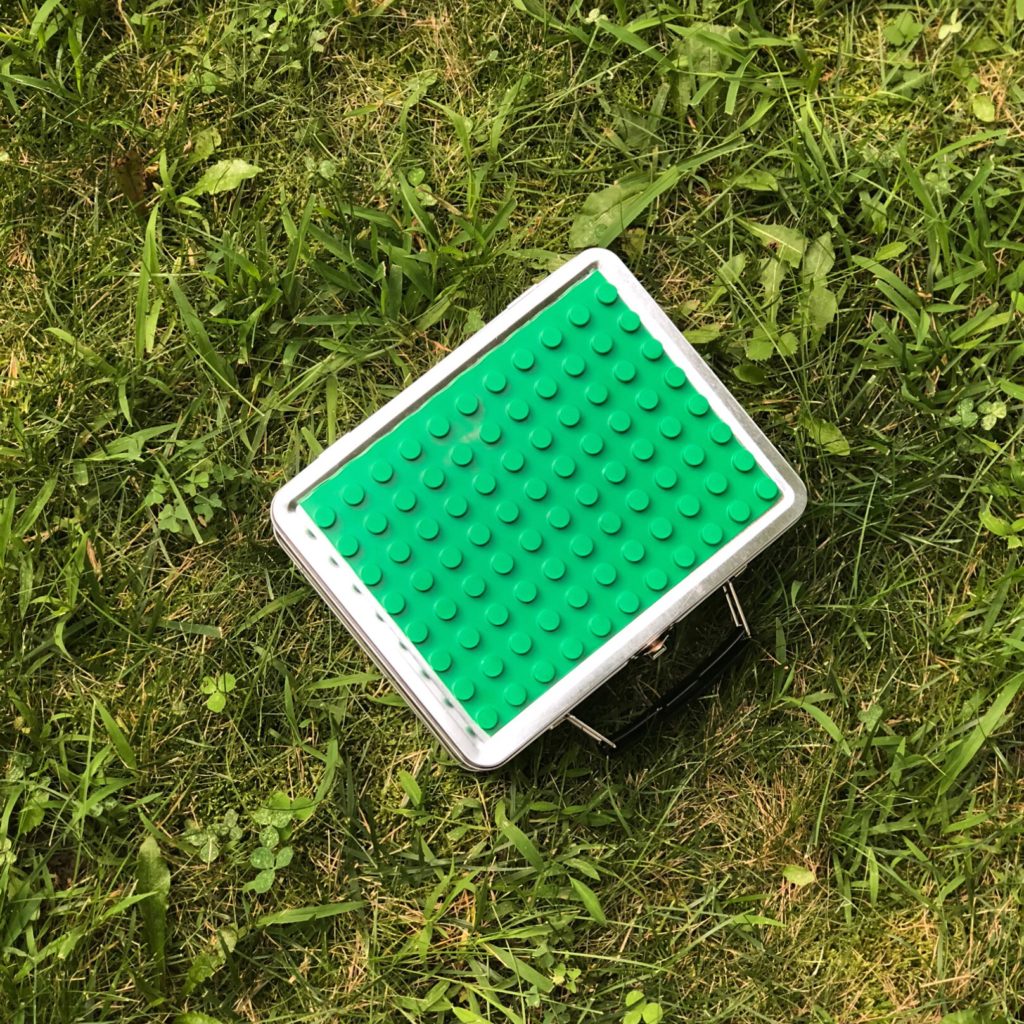
For the lego portion, you will need to purchase a Lego baseplate. They come in Lego Duplo size as well as a Lego Classic size. The classic legos are a bit small for an 18-24 month old so I used the Lego Duplo size. For older kids, the classic legos will work perfect. Measure the top of the box and while using a utility knife, cut the plate to size. Use high power hot glue gun to set the base in place.

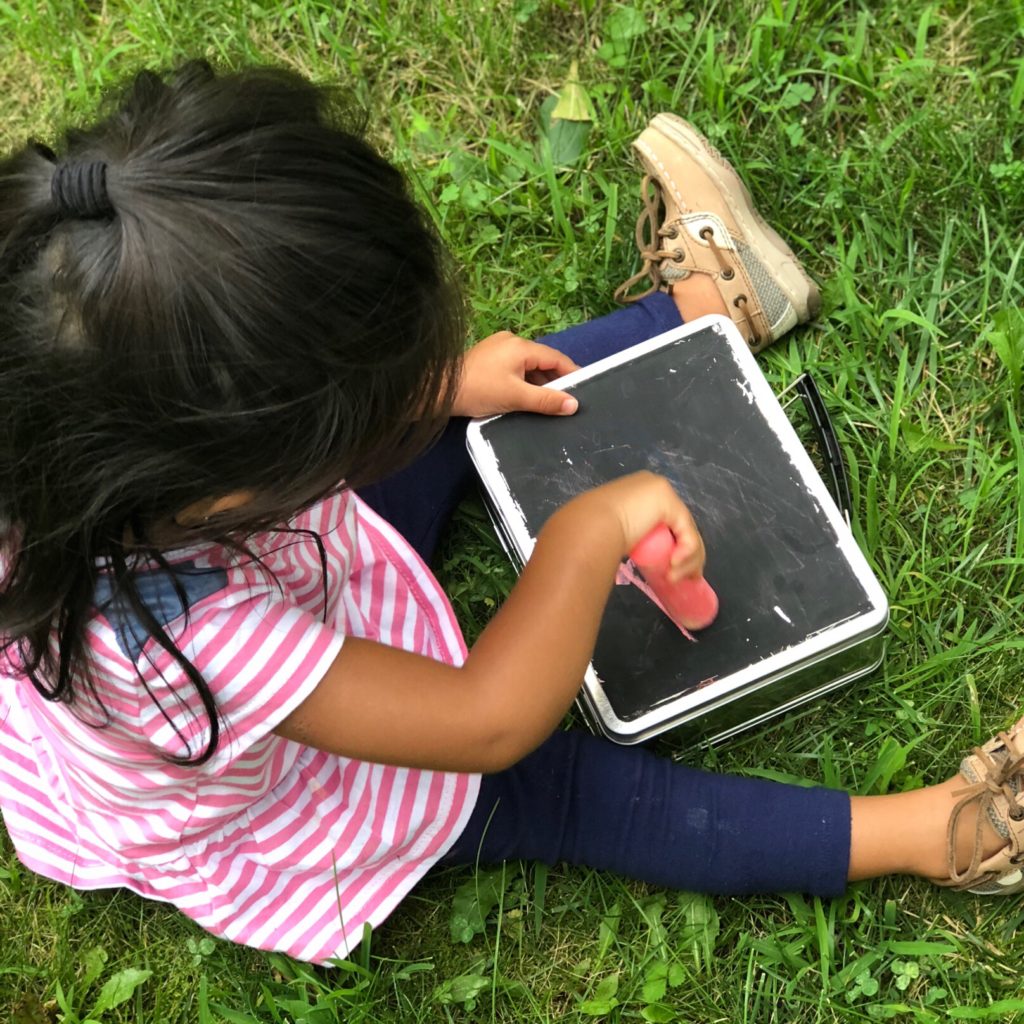
To make the chalkboard portion, you will need chalk paint and a paint brush. Follow the instructions on the paint bottle. I used 2 coats of paint to get good coverage but I would recommend 3 coats. Make sure you let the paint dry 2 hours after each coat. If you want an easier way out, I found large chalkboard labels you can simply stick onto the box instead of painting. You might need to replace them every so often.
That’s it for the outside of the box!
Now the good part is what you put into the box. The kids will love this part, it’s like opening 20 new toys and endless hours of exploring. Since I’ve used this box on a few trips now, I changed up the items I put in there so there’s always something new to explore.
The activities include:
- A bag of Legos
- Sticker book
- Playdough
- A bag of pom poms and pipe cleaners
- Stringing activity
- Coloring book with crayons
- Chalk
- Wooden magnets
- ABC flash cards
- Stamps
SHOP THE POST: