Toddler Bedroom Makeover DIY Book Ledge |ORC Week 5
It’s already week 5 of the One Room Challenge and I am super close to the finish line! To recap, I am updating my 4 year old’s bedroom with a new bed, updated dresser and an awesome reading corner.
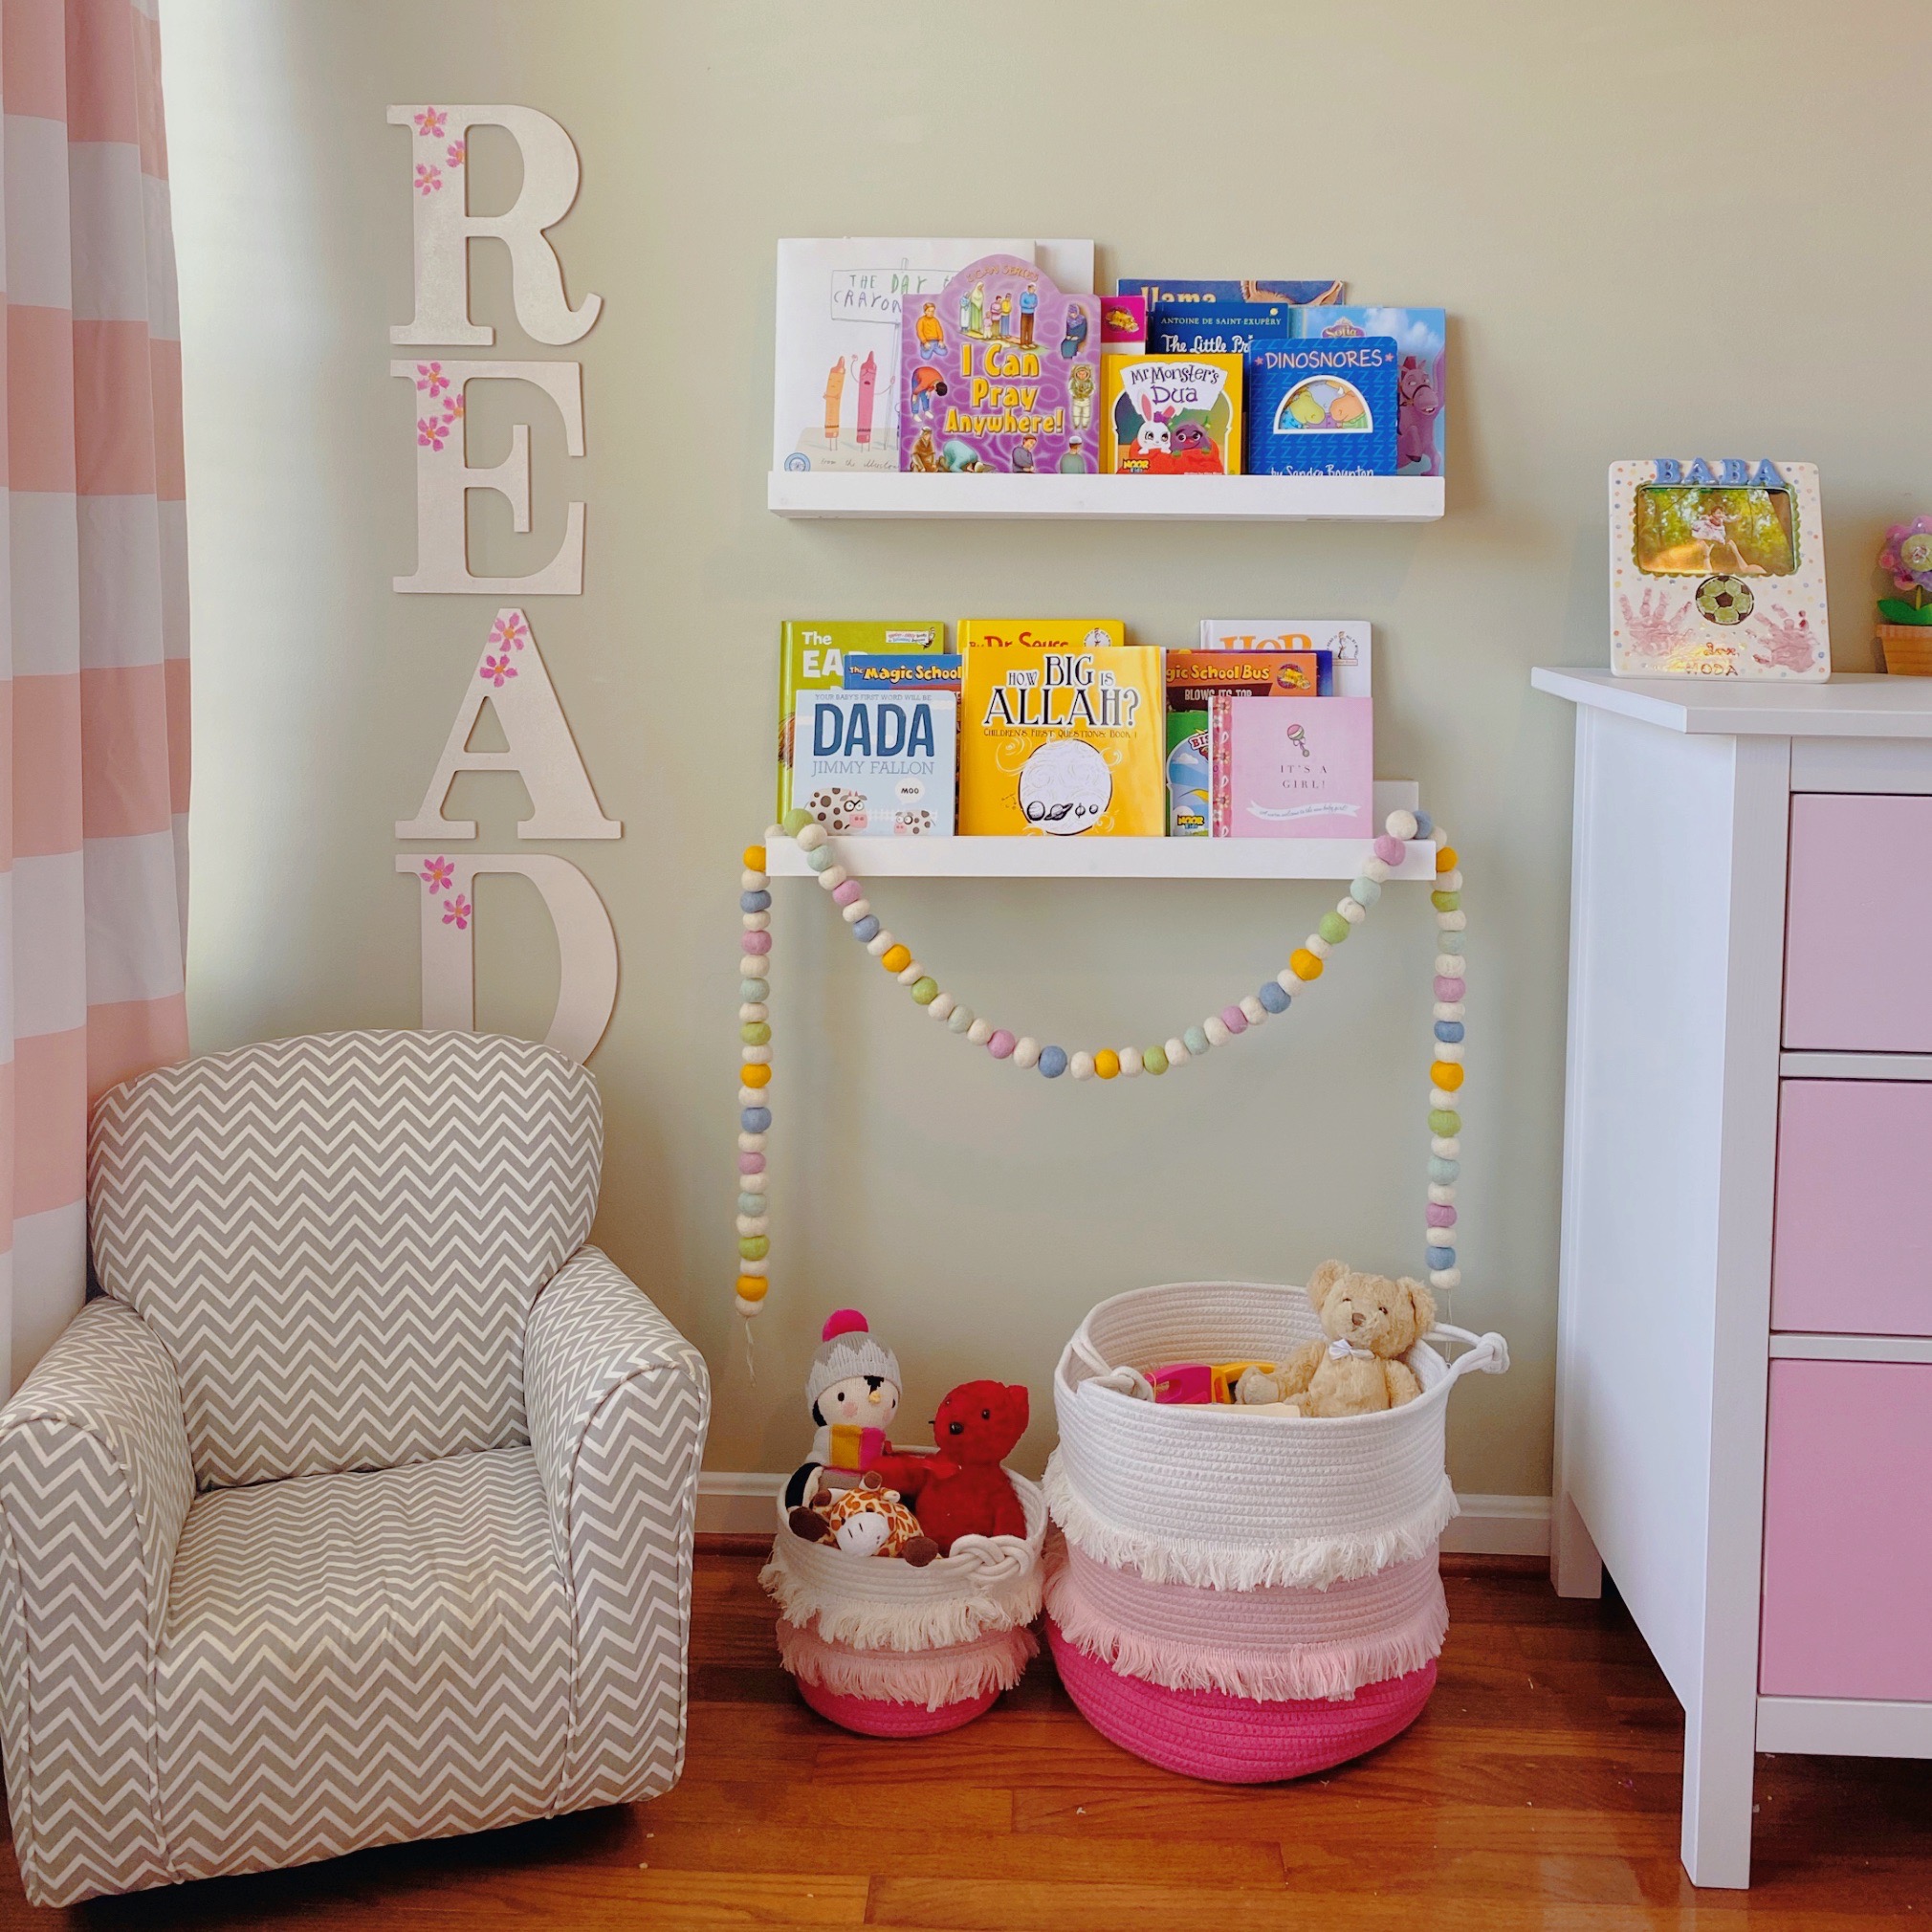
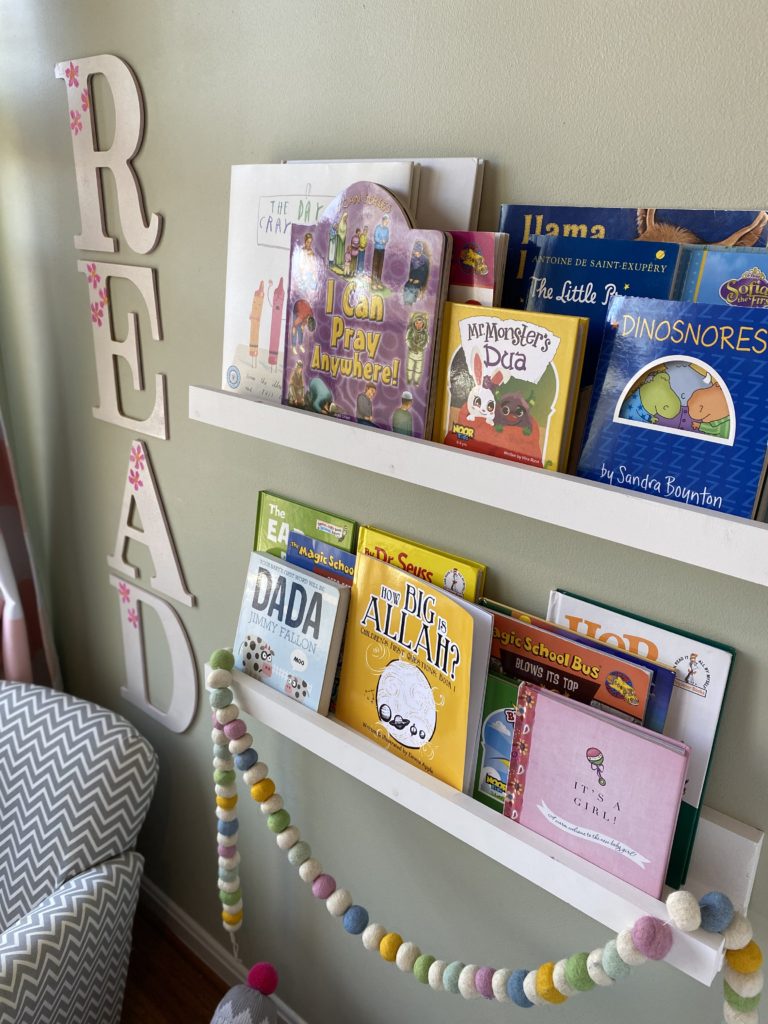
The past 2 weeks I’ve been working on the reading corner and taking my time to perfect it between mom life, work life and all the things. I made a book ledge using scrap wood I had left over from other projects to showcase all her books better and make it within reach.
Here is s short tutorial on how the book ledge came together:
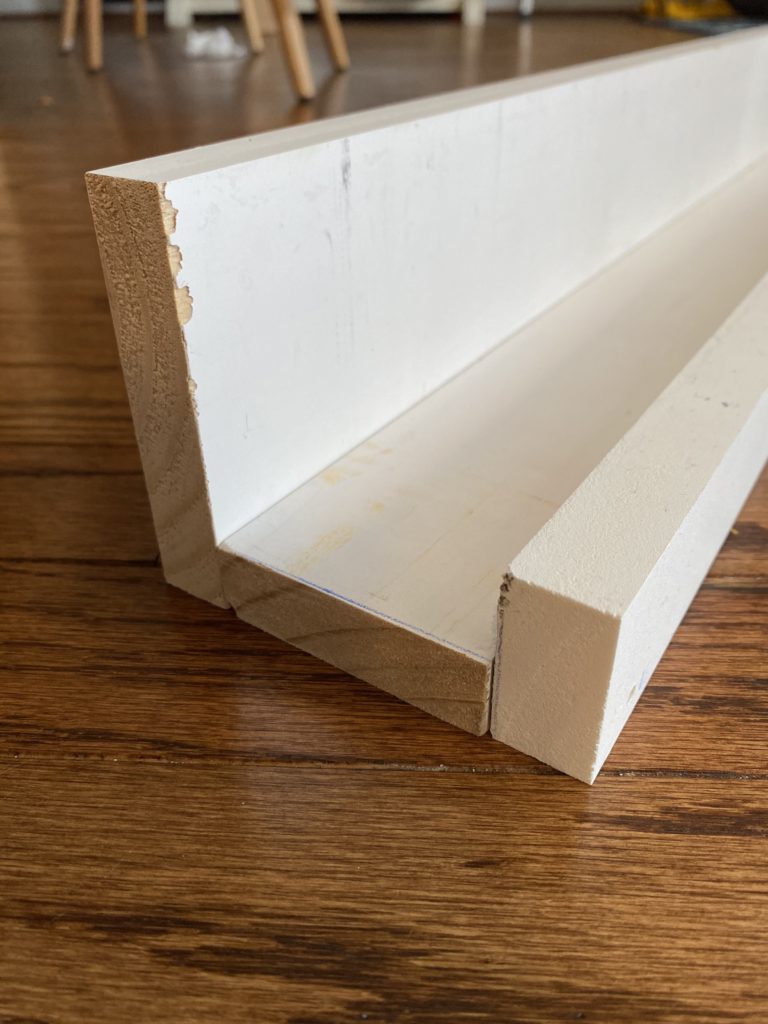

I used 3 pieces of wood all measured out to 26 inches width. The backing is a 1×4 wood trim, the base is 1×3 wood trim and the front lip is 1×2 wood trim.
I put those 3 pieces of wood together just like it is shown above and then screw it in using a regular screw. Ideally if you have a nail gun, this would make it look more seamless. If you want an exposed screw look, consider using a flat head screw and maybe a different color screw so it looks good exposed.
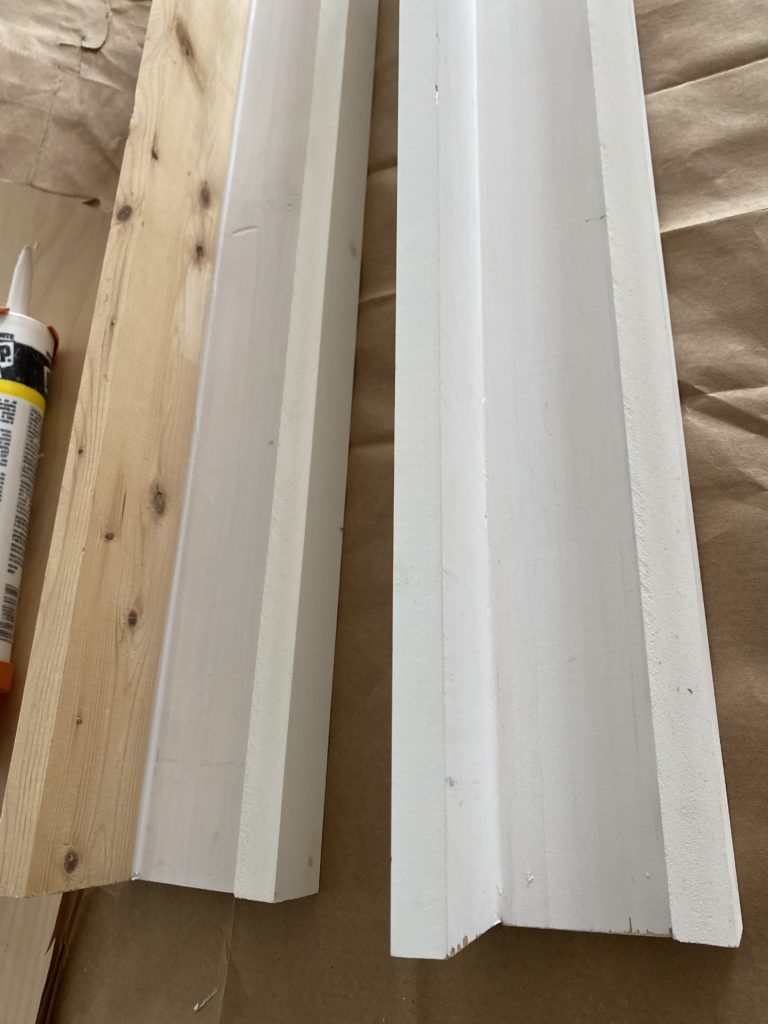
Next, I filled the spaces between the wood with caulk so it looked like one piece. Then, I painted the wood white using left over interior paint samples and a foam roller.
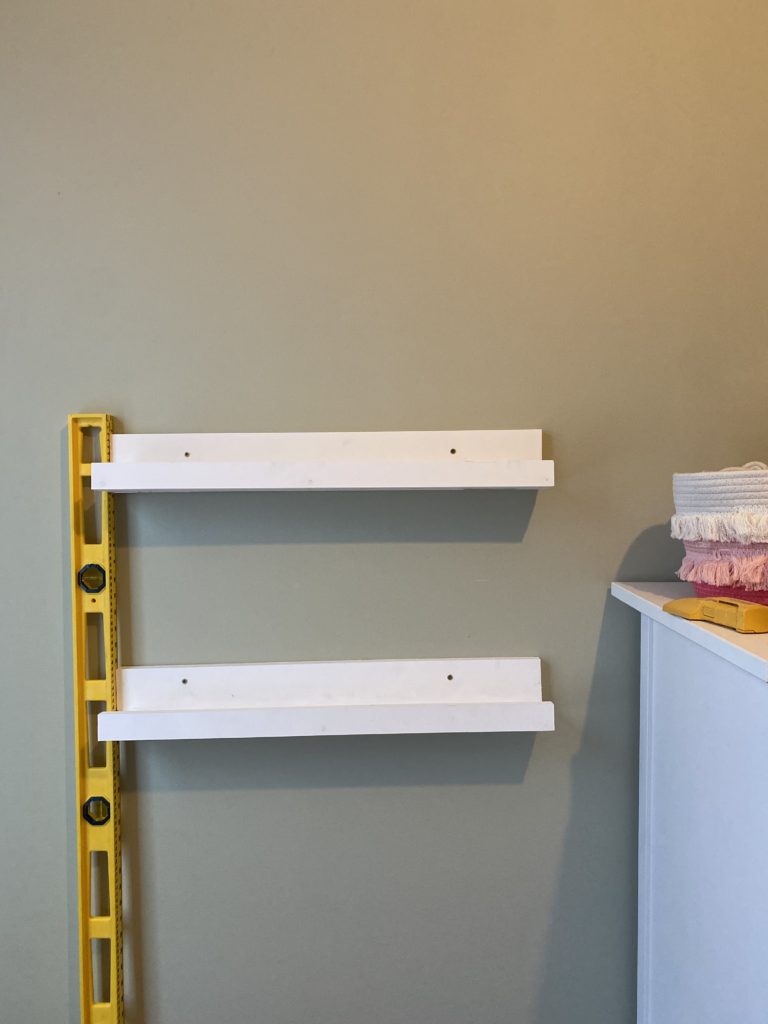
Last step was to mount it on the wall and add all the decor!


Don’t forget to check out what the other wonderful designers are up to on their One Room Challenge here