Before and After: Home Office Gets Minimalist Makeover
The office/studio space is my second favorite room in the house after the coffee bar. I spend a lot of my time in there with my henna clients, blogging, crafts, you name it. I wanted this room to look elegant and classy for when I have clients over but still be practical for when I have to get work done. It was so much fun giving this room a much needed makeover. I looked through so many design ideas and finally came up with something that showcases my work and that is unique to my space.
I’m so excited to finally show off this room! It’s my favorite place in the house and what’s even more satisfying about it is that I was able to design and decorate the whole thing by myself!
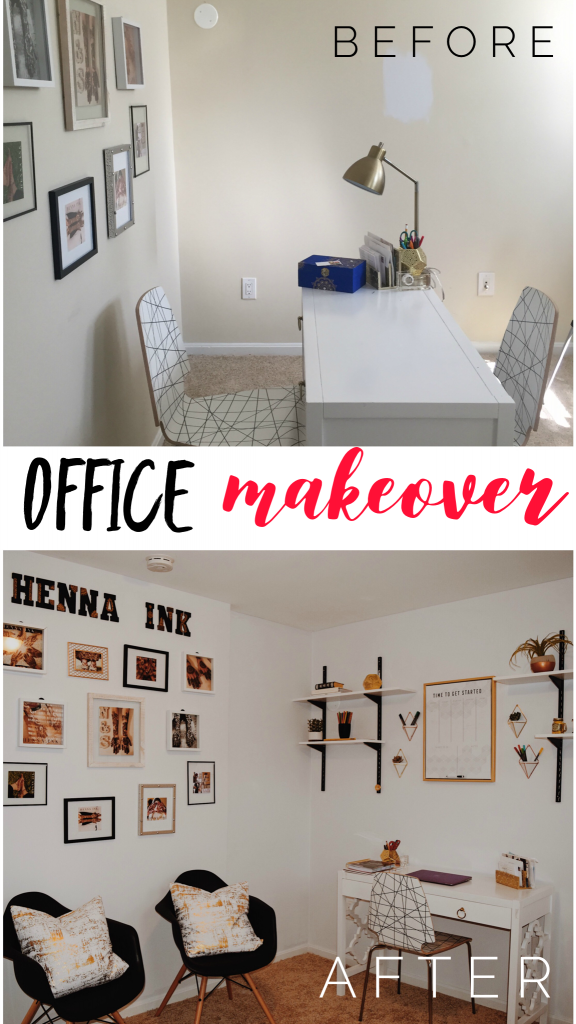
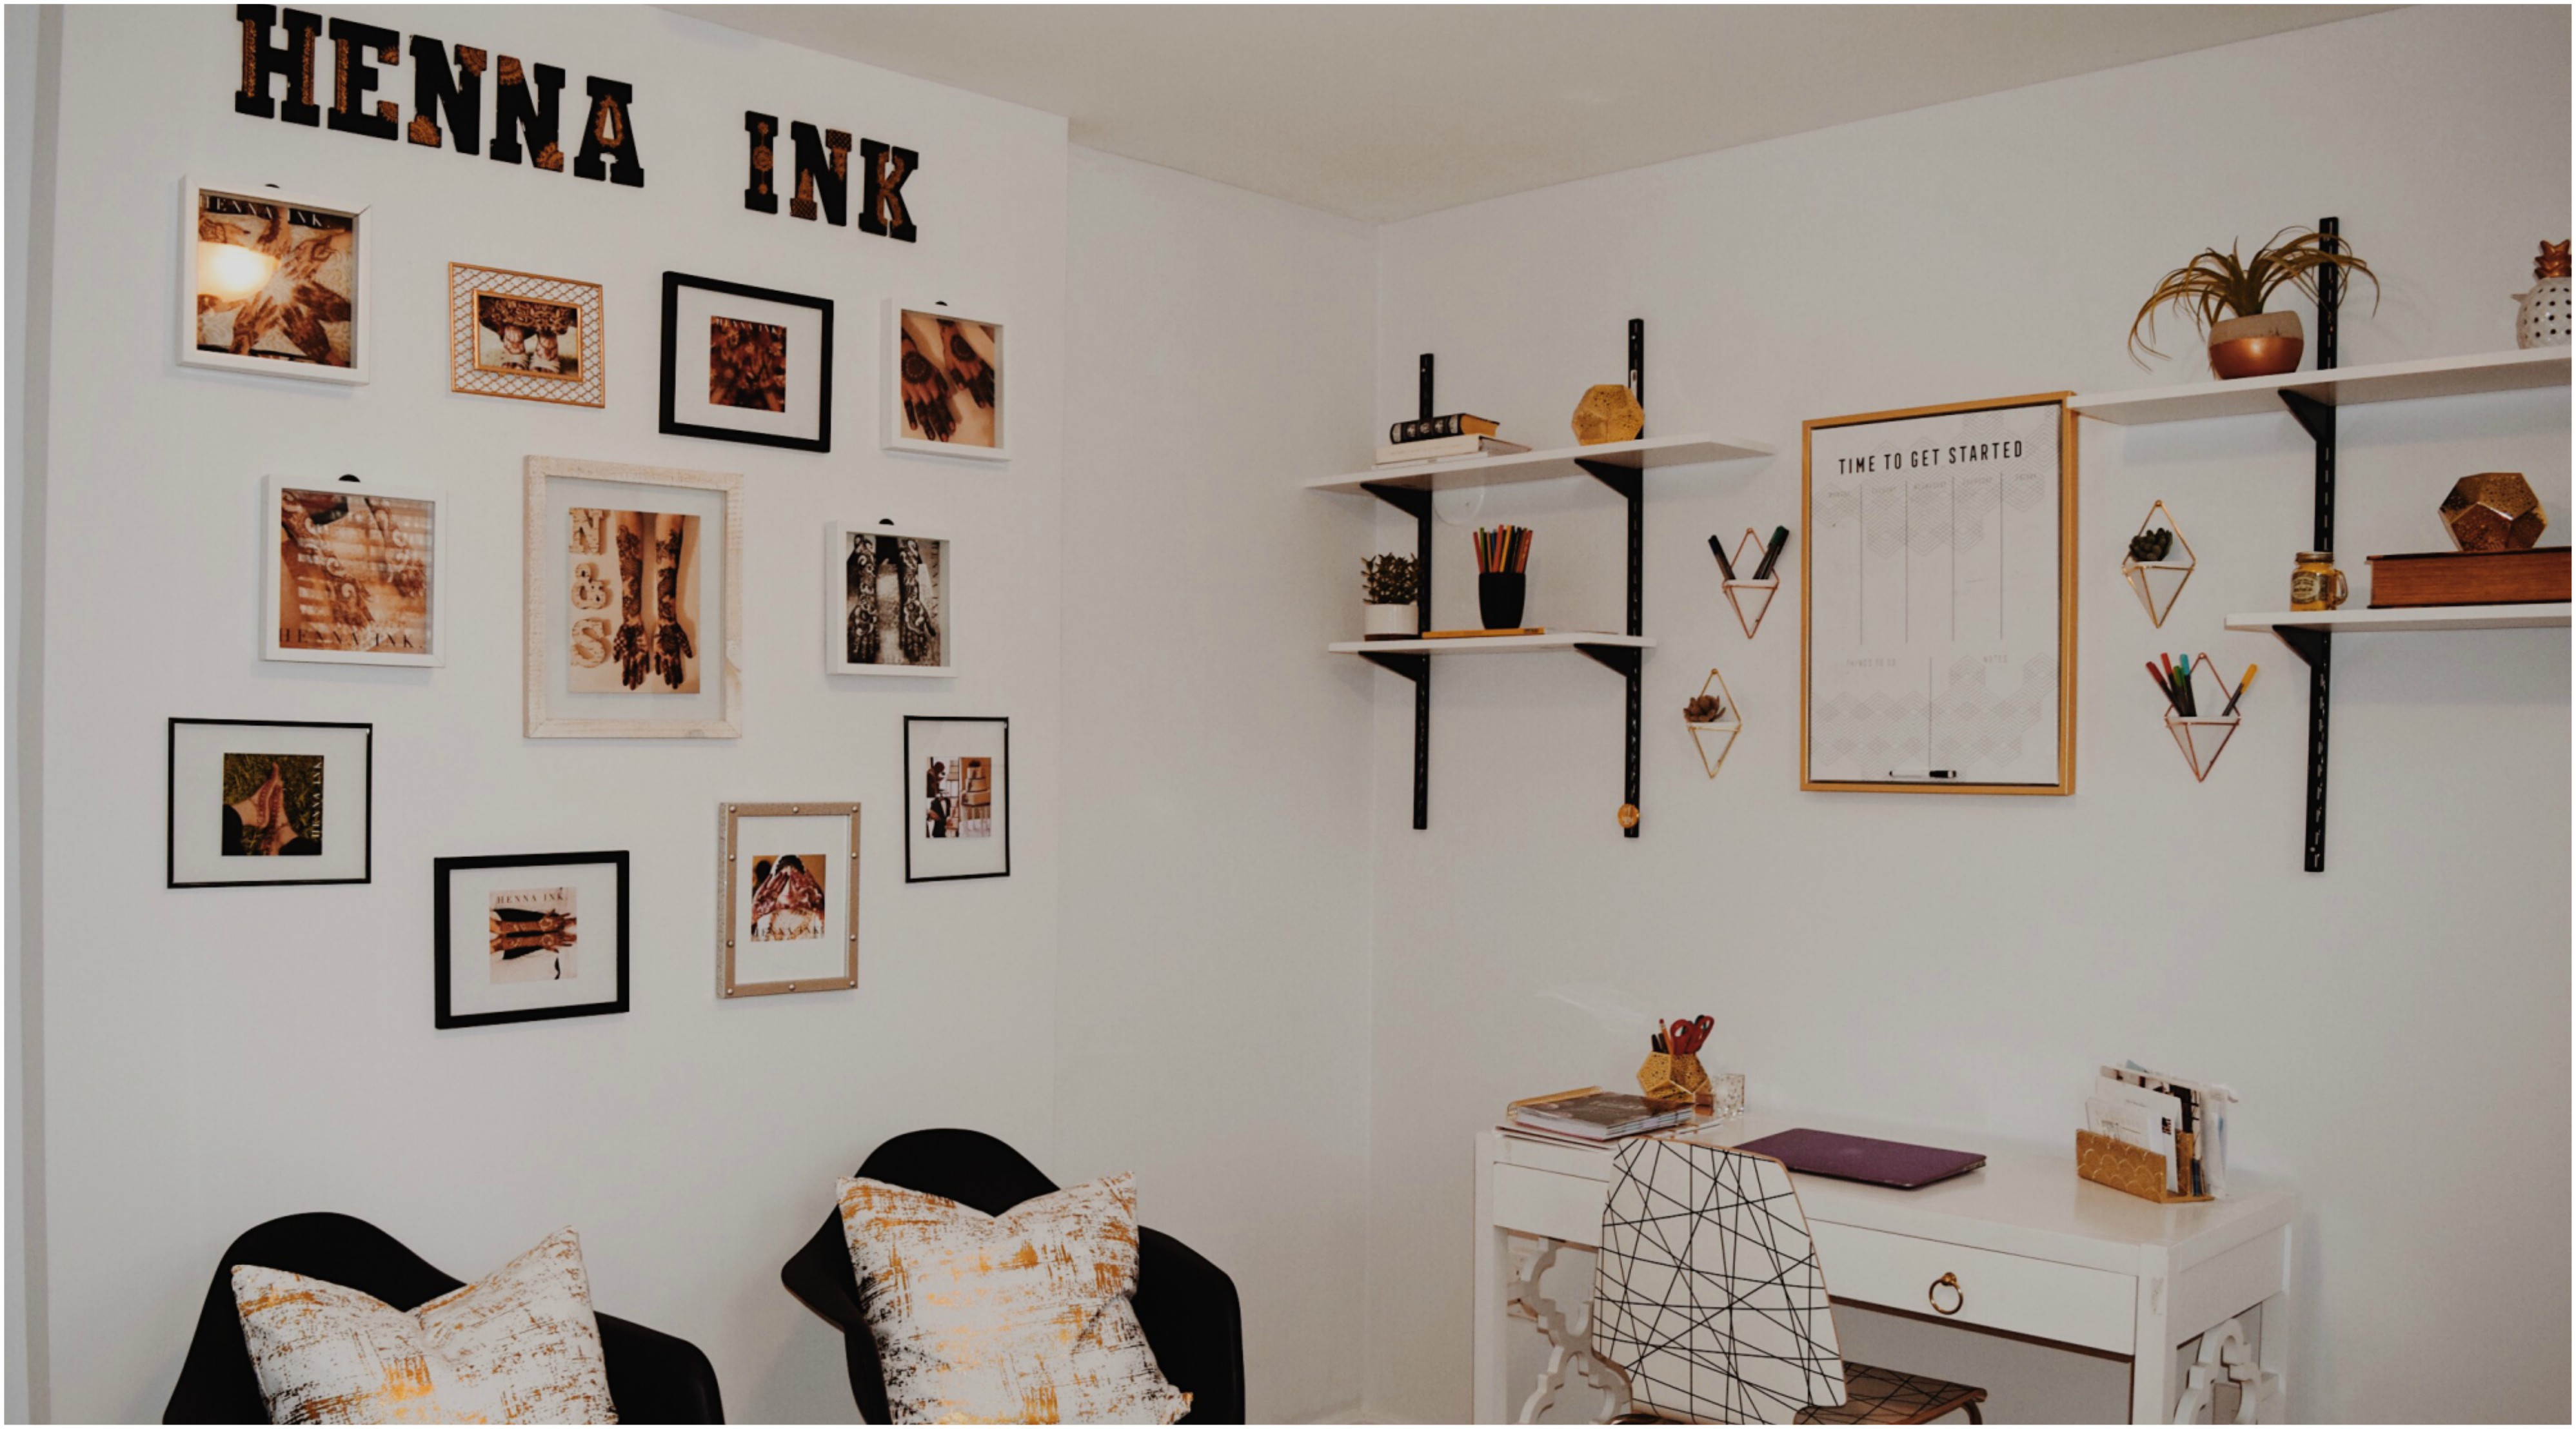
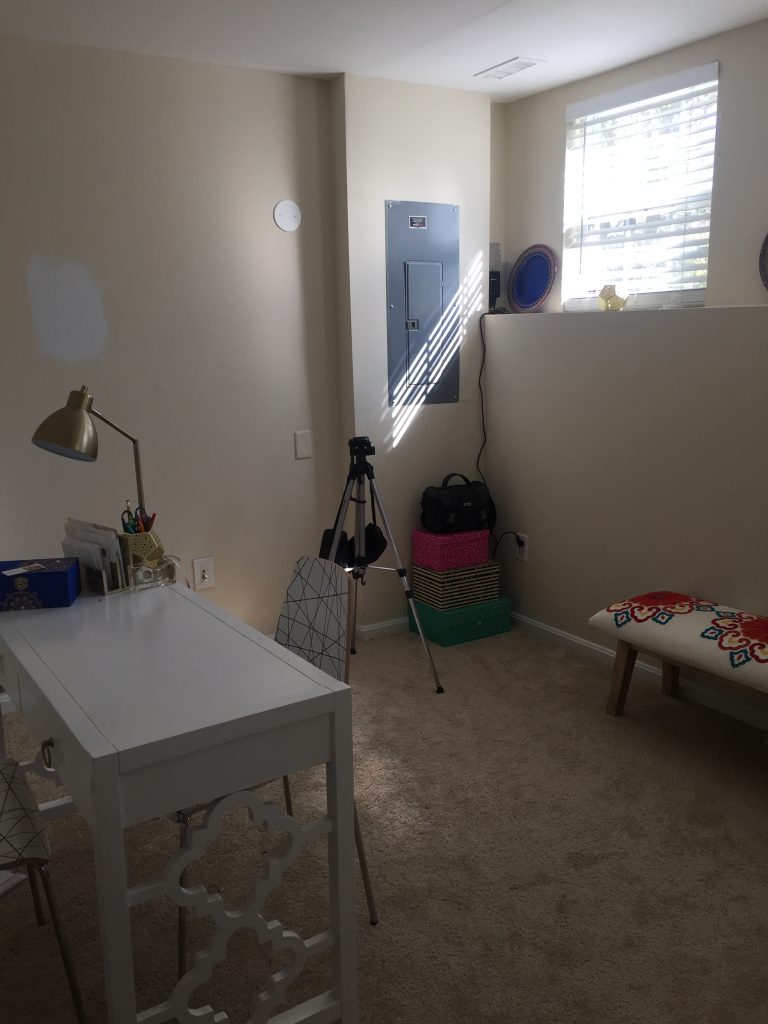
First things first, here are some before pictures of the room. I knew I wanted to go with a minimal black and white color theme with touches of gold, wood and greenery. The walls were painted a beige color when we bought it. I finally got around to painting the room a white-gray color called Silent White by Behr. I couldn’t be more happier with the color, it felt like the room got a whole lot brighter and bigger. The gallery wall with the Henna Ink sign were already up there from when I initially started the decor a year back. I took down the frames but the Henna Ink sign was stuck pretty good so I painted around it with a small paint brush.
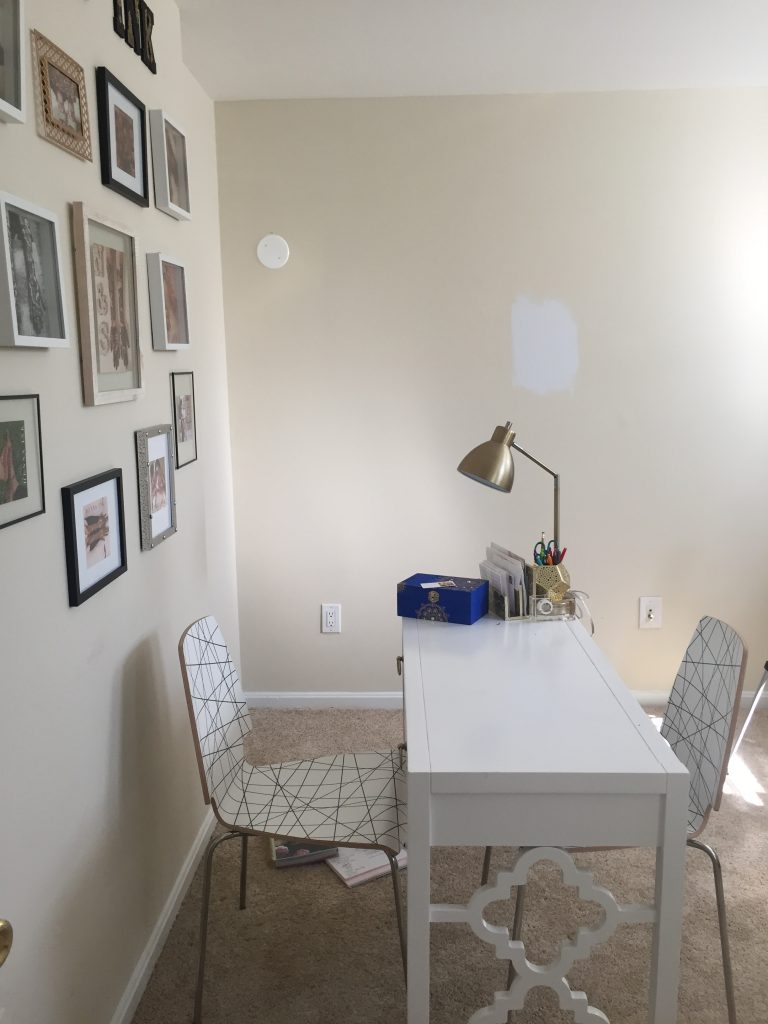
The biggest eye sore in the room is the circuit panel that’s right in your face. It’s the first thing you see when you walk in so I had to figure out how to cover it up in a way that would also be easily accessible. I bought two large canvases that are big enough to cover the whole thing but I haven’t figured it out what to do with it. When I do I’ll update this post! I’m thinking of putting my watercolor painting skills, which doesn’t exist, to the test.
Ok, let’s talk about the shelving situation. I wanted this wall to have unique shelving and not just your regular floating shelves. I loved the idea of having exposed tracks so I headed over to Home Depot to see what I could find.
I found black tracks in the shelving section that I had cut to fit the right measurements. From there I also found white shelves. I bought two different sizes, a 12 in X 36 in and a 12 in X 48 in. I got two of each, the longer ones for the top and shorter ones for the bottom. To get the shelves to attach to the tracks, I bought black brackets. You have to make sure the brackets aren’t too big for the shelf, you don’t want it to stick out from underneath. That’s pretty much it for the shelving! It was so easy and so inexpensive to create.
- 4 Adjustable Tracks Black– $7-$14 each depending on size
- 8 Brackets– $4 each
- 4 Shelves– $10-$14 each depending on size
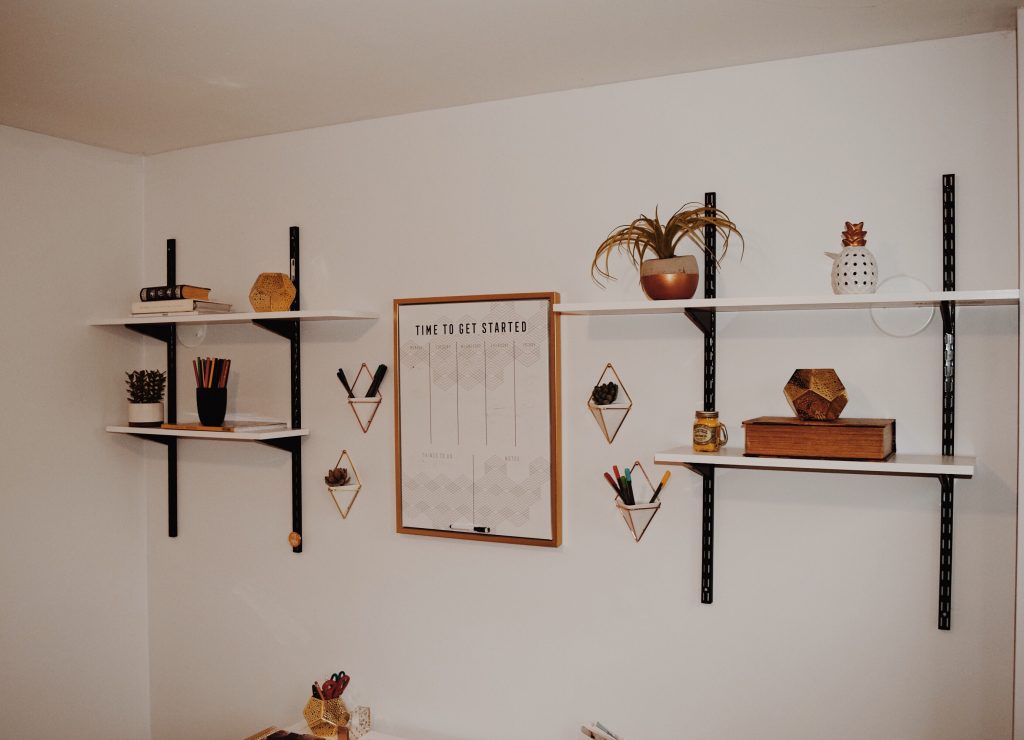
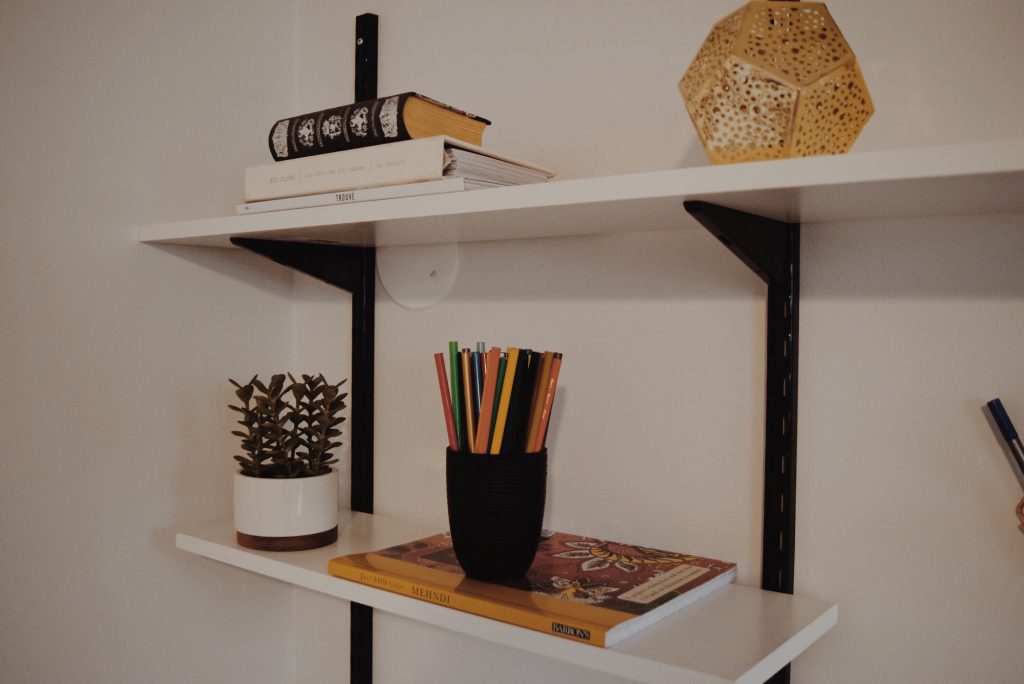
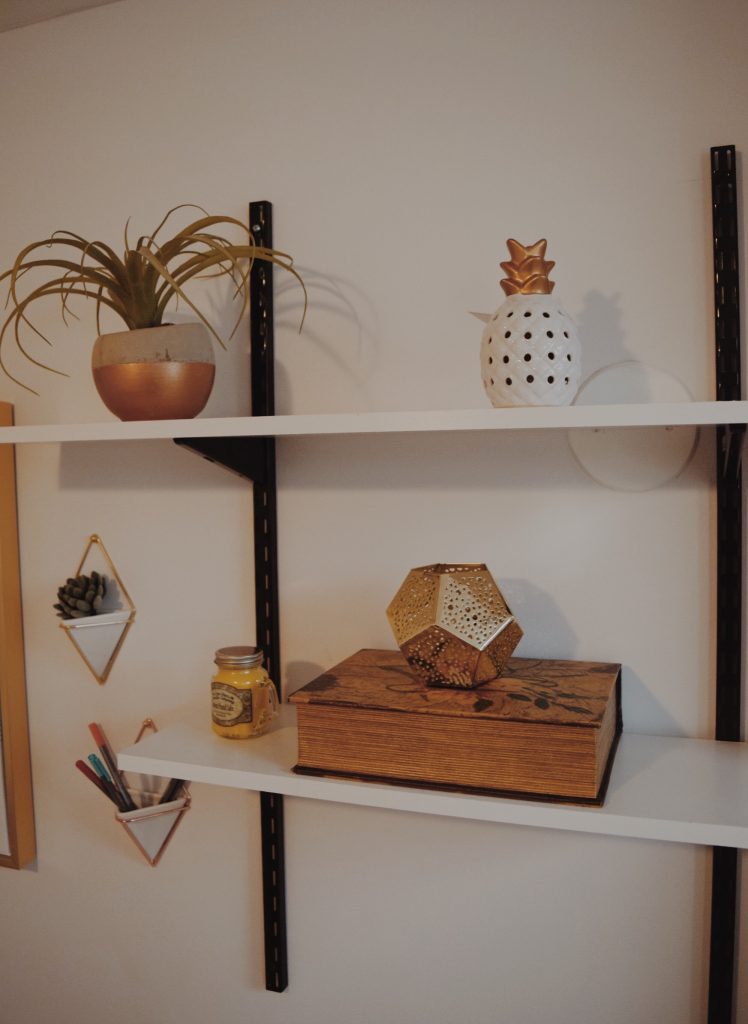
For the shelf decor, I found some random items around the house such as books and old planners. I found a black cup to house all my color pencils. The artificial plants and pineapple candle, I found at HomeGoods. The gold accents on the decor pieces ties everything together and I’m obsessed!
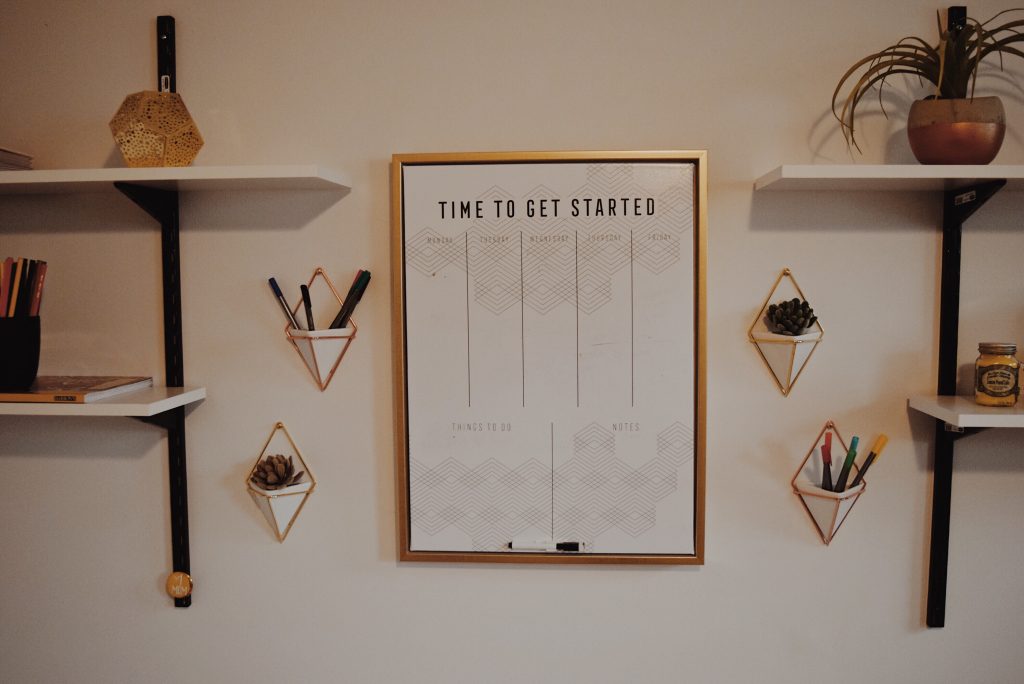
Now for the center of the wall, in between the shelving I wanted some sort of vertical calendar or white board that I can write all my upcoming appointments. Again I headed to places like HomeGoods, Marshall’s and Hobby Lobby to see what I could find because they have the best things and the best prices. I got lucky with this white board calendar because it has a gold frame and it’s vertical like I wanted. It fits so well in the space.
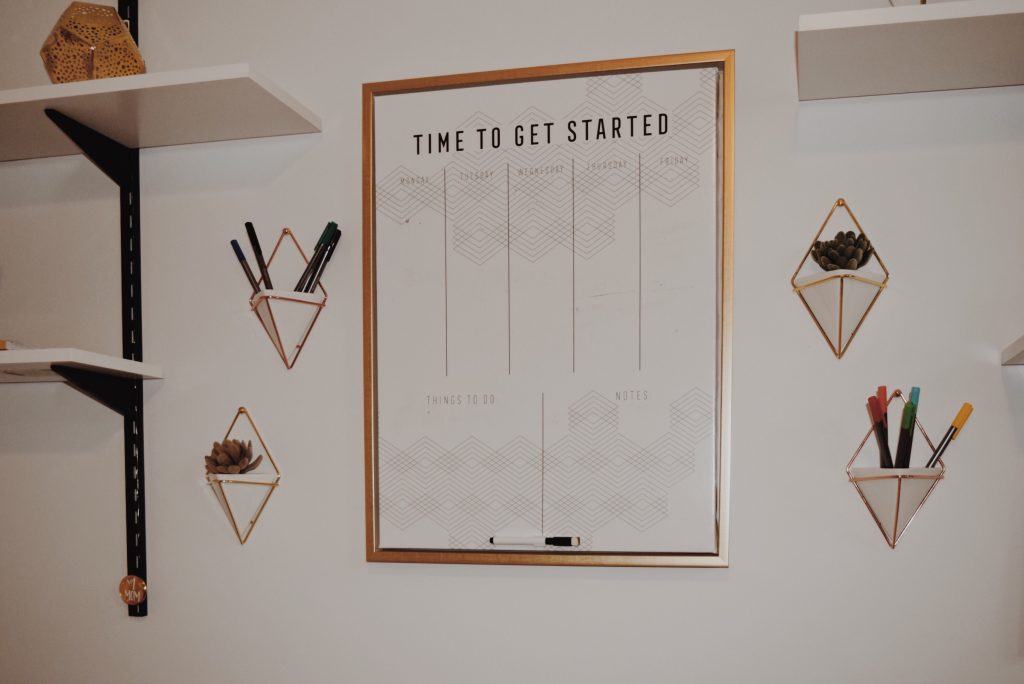
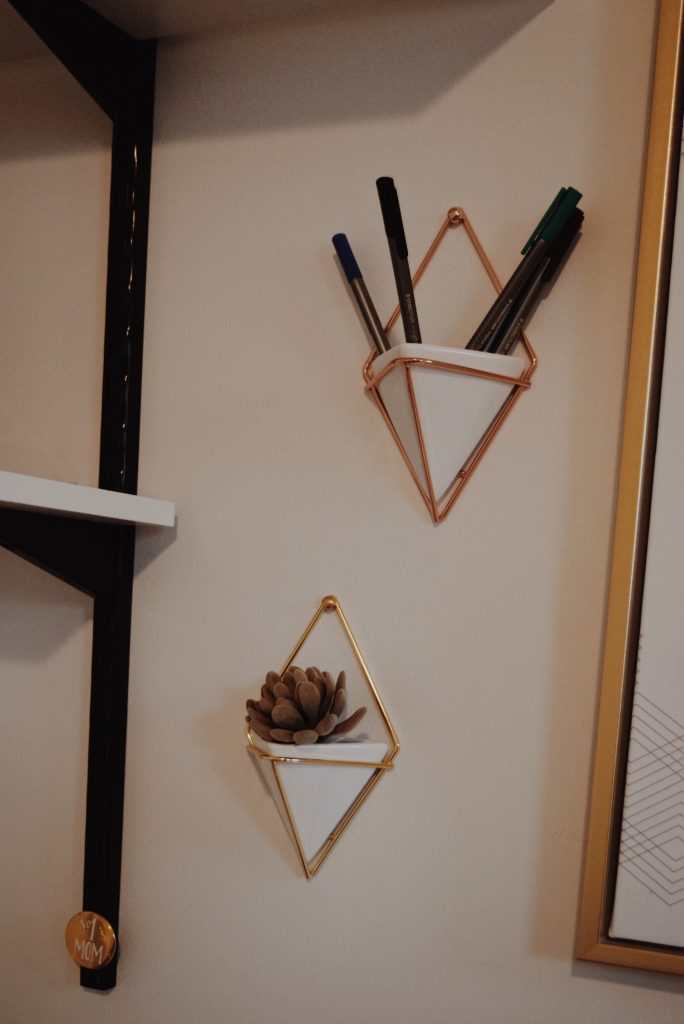
This is my cutest part of the whole set up. I bought these hanging plant holders from Amazon to put all of my pens in. I originally bought just two but then I felt like the space needed something else so I bought two more and put faux succulents in them. I mixed and matched the rose gold and gold finish.
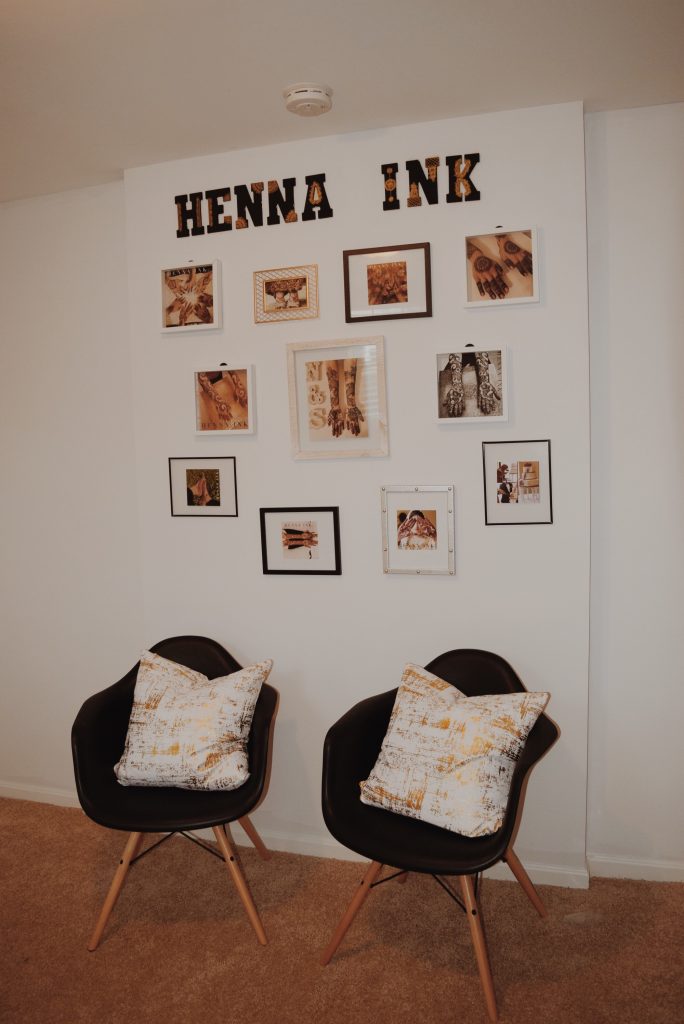
This gallery wall is the show-stopper for the room. Everyone that comes in always compliments it which makes me so happy! This was the best way to showcase my work. The frames are mixed and matched that I found at Hobby Lobby and Michaels. I went with plain white, black, wood and metal frames. The wall came together beautifully and play well with each other.
The beautiful Eames chairs are my favorite! They are super comfortable for when my clients are waiting. I knew I wanted Eames chairs because I have similar white ones for my dining room. I incorporated some white and gold cushions for added comfort and design.
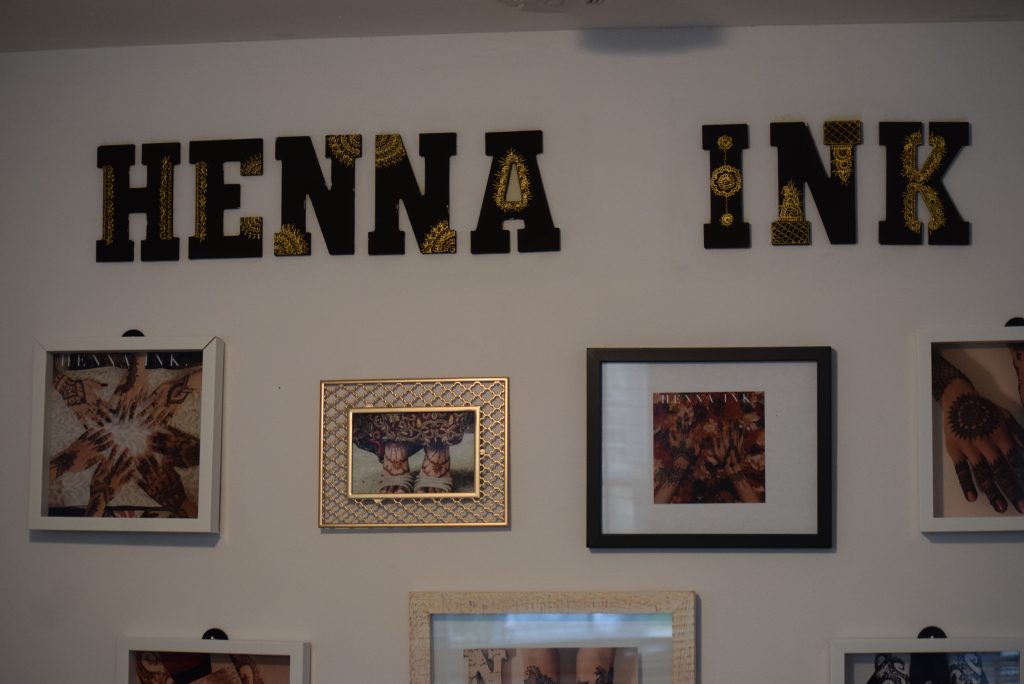
Moving on to the Henna Ink. sign! If you don’t know by now, Henna Ink. is the name of my business. I painted and designed the letters myself to add elements of henna into the space. I picked up the letters from Michaels, painted them a matte black then using metallic gold paint, I hand drew the designs on it.
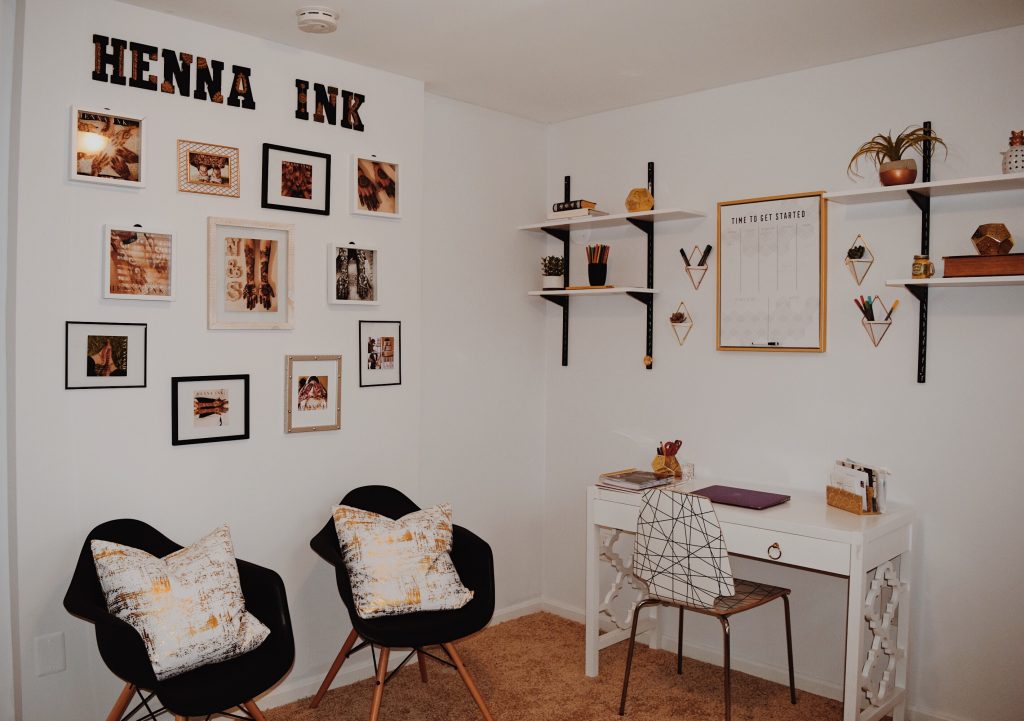
The last thing to put together was the desk and chair. The design on legs of the desk is so elegant I can’t get over it! I also got this piece at HomeGoods almost 2 years ago. The funky white and black chair is from IKEA.
And that’s it for this office makeover! I’m beyond pleased with the way it turned out. Every time I walk in there I feel like I am ready to take on the day! What did you think? Did I nail it? I would love to get your feedback and what you think I should do next.
XOXO
For other DIY projects in my home, click the images below!